Plays generate tasks based on the activities captured in Salesloft. So if there are common workflows you would like your team to perform, like sending a follow-up email after a meeting or making sure reps respond to any email reply from a potential buyer, Plays will make sure those tasks are on your reps’ to-do lists.
If your team is new to Salesloft, a couple of plays will be enabled by default. These Plays are such common best practices we recommend everyone give them a try.
Outside of the default Plays, we encourage you to create the Plays that meet your team’s business needs. Your plays should promote action that fits your team’s workflow.
In this article, you will learn how to create a Play. This article includes:
- Plays can only be created or edited by Salesloft Admins.
- Plays will apply to the entire team, unless assigned to a specific group.
Salesloft offers Play Frameworks as the base level structure for creating Plays. Play Frameworks consist of a pre-established signal– like an email response– and allow you to customize the Play.
Things to Note: The Play signal can not be altered or customized.
There are various types of Play Frameworks, including: Meeting Plays, Emails Plays, and Integration Plays.
To create a new Play from a Framework, follow these steps:
- Navigate to your settings: Click your initials in the upper right corner of Salesloft's home screen. This will open your settings.
- Select Plays: Scroll down the left menu panel to find the Workflow category. Then, select Plays. This will open the Plays Settings page.
- Click +Create Play: Click +Create Play in the upper right corner of the page. This will take you to the full list of Play Frameworks available to your team, including both Salesloft and Partner plays.
- Choose a Framework: Scroll through the list and select your desired Framework. You will be directed to the New Play page where you can customize your Play.
After choosing a Play Framework, the next step is to name your Play.
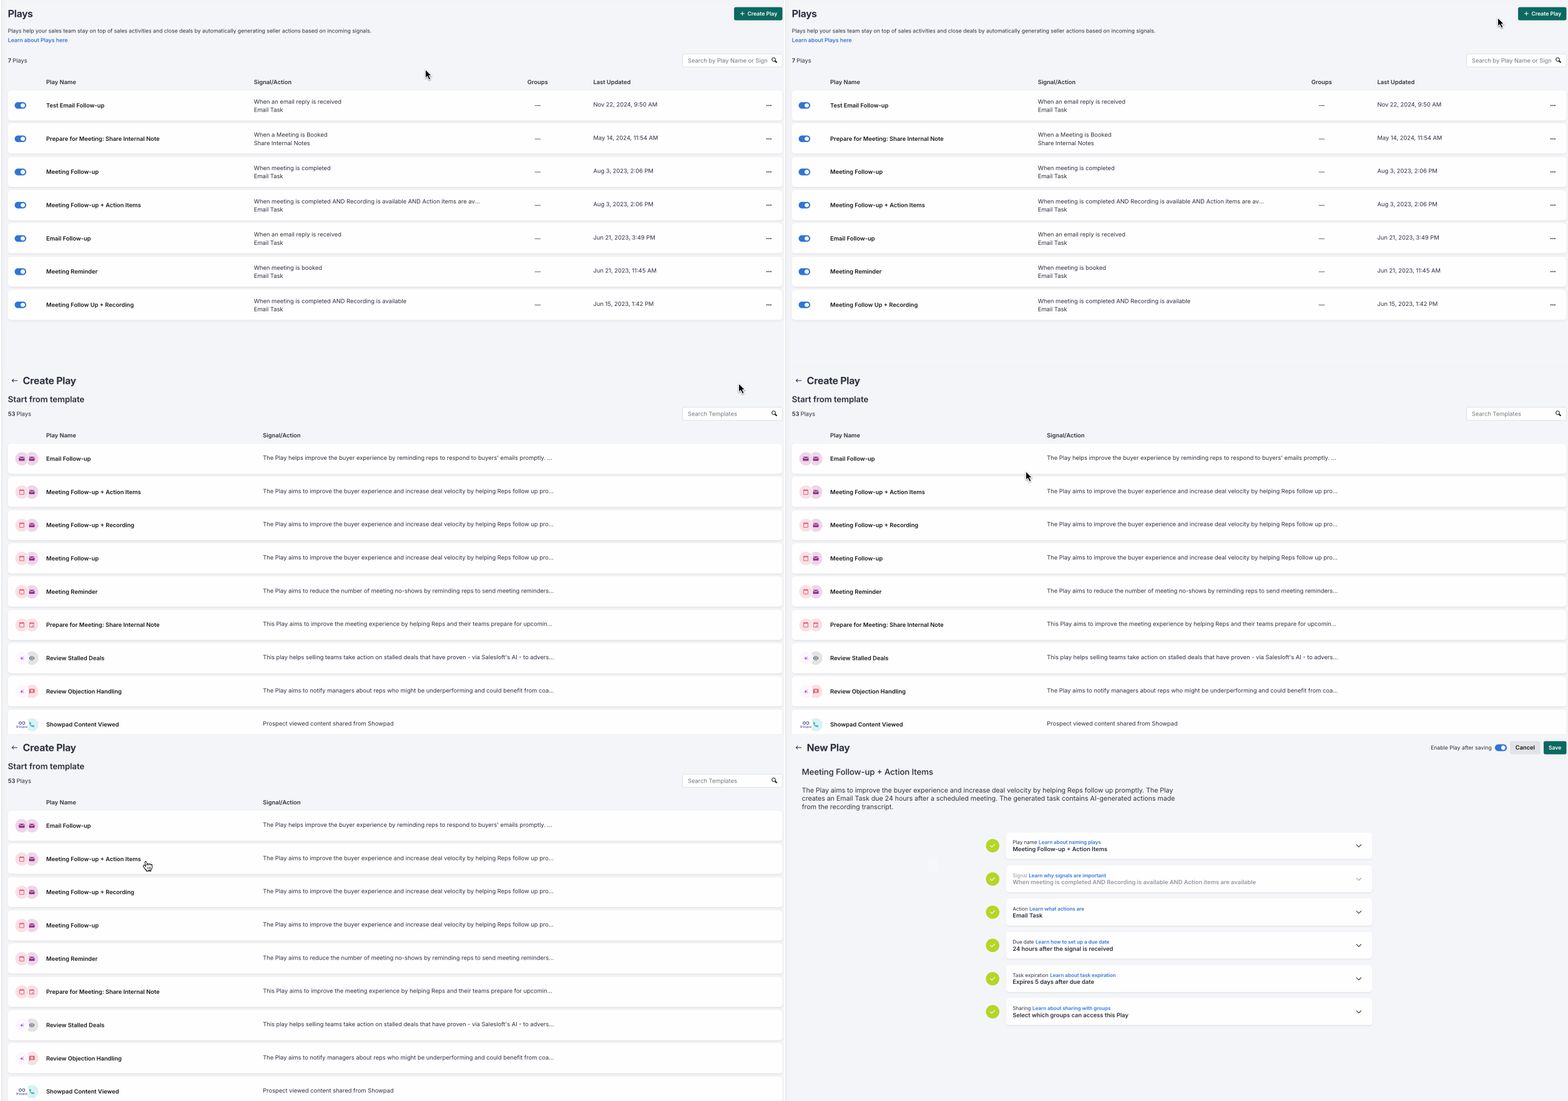
Figure 1: Gif depicting the process of selecting a Play Framework.
Naming a Play allows you to provide quick insight about the action and the signal that prompted the action. A clear and descriptive name is vital for effective communication as it helps your team understand what they are being prompted to do without having to explain in full detail.
When you open the Play Framework, the first thing you are prompted to do is name your Play. To name your Play, follow these steps:
- Open the Play dropdown: Click Play name to open the dropdown section.
- Enter your Play Name: A preset name will appear in the name field. You can edit the name to your preference or type a new name into the field.
After naming your Play, the next step is to review the Play signal.
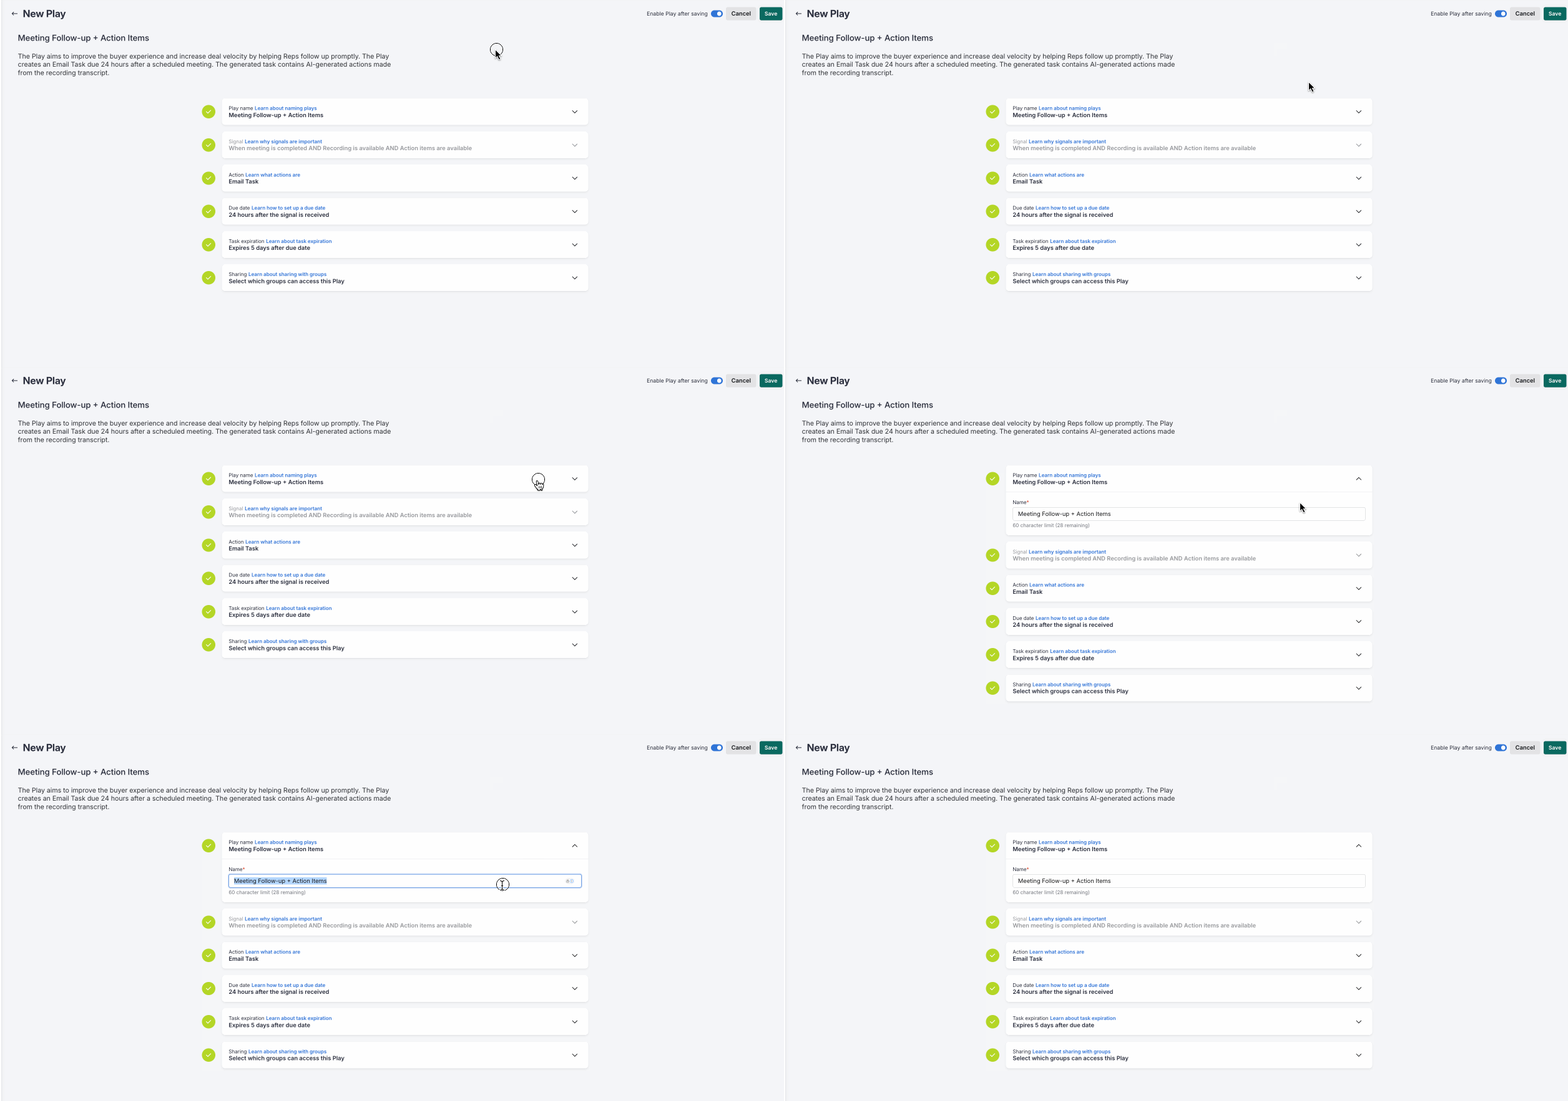
Figure 2: Gif depicting the process of naming a Play.
A Signal is the specific activity that triggers a Play to run. On the New Play page, Play Frameworks are categorized by their required Signal. Therefore, when you select a framework, you are also pre-selecting its built-in Signal, which cannot be edited. The Signal section simply displays the trigger you've chosen by selecting the framework.
Here are some examples of Play signals you can expect to see:
- Meeting is booked
- Meeting is completed
- Recording available (Conversations customers only)
- Action items available (Conversations customers only)
- Contract signed (Docusign Integration Play)
- Content is viewed (G2 Integration Play and Seismic Integration Play)
- Content is downloaded (Highspot Integration Play)
- Video is watched (Vidyard Integration Play)
Things to Note:
- Before creating a third-party integration Play, be sure that users have enabled the integration from the Administration Integration Settings.
- Enablement for third-party integration Plays differ based on the third-party application. Before creating a third-party integration Play, check out the Manage Users article to learn more about setup.
After reviewing your Play signal, the next step is to add standard criteria.
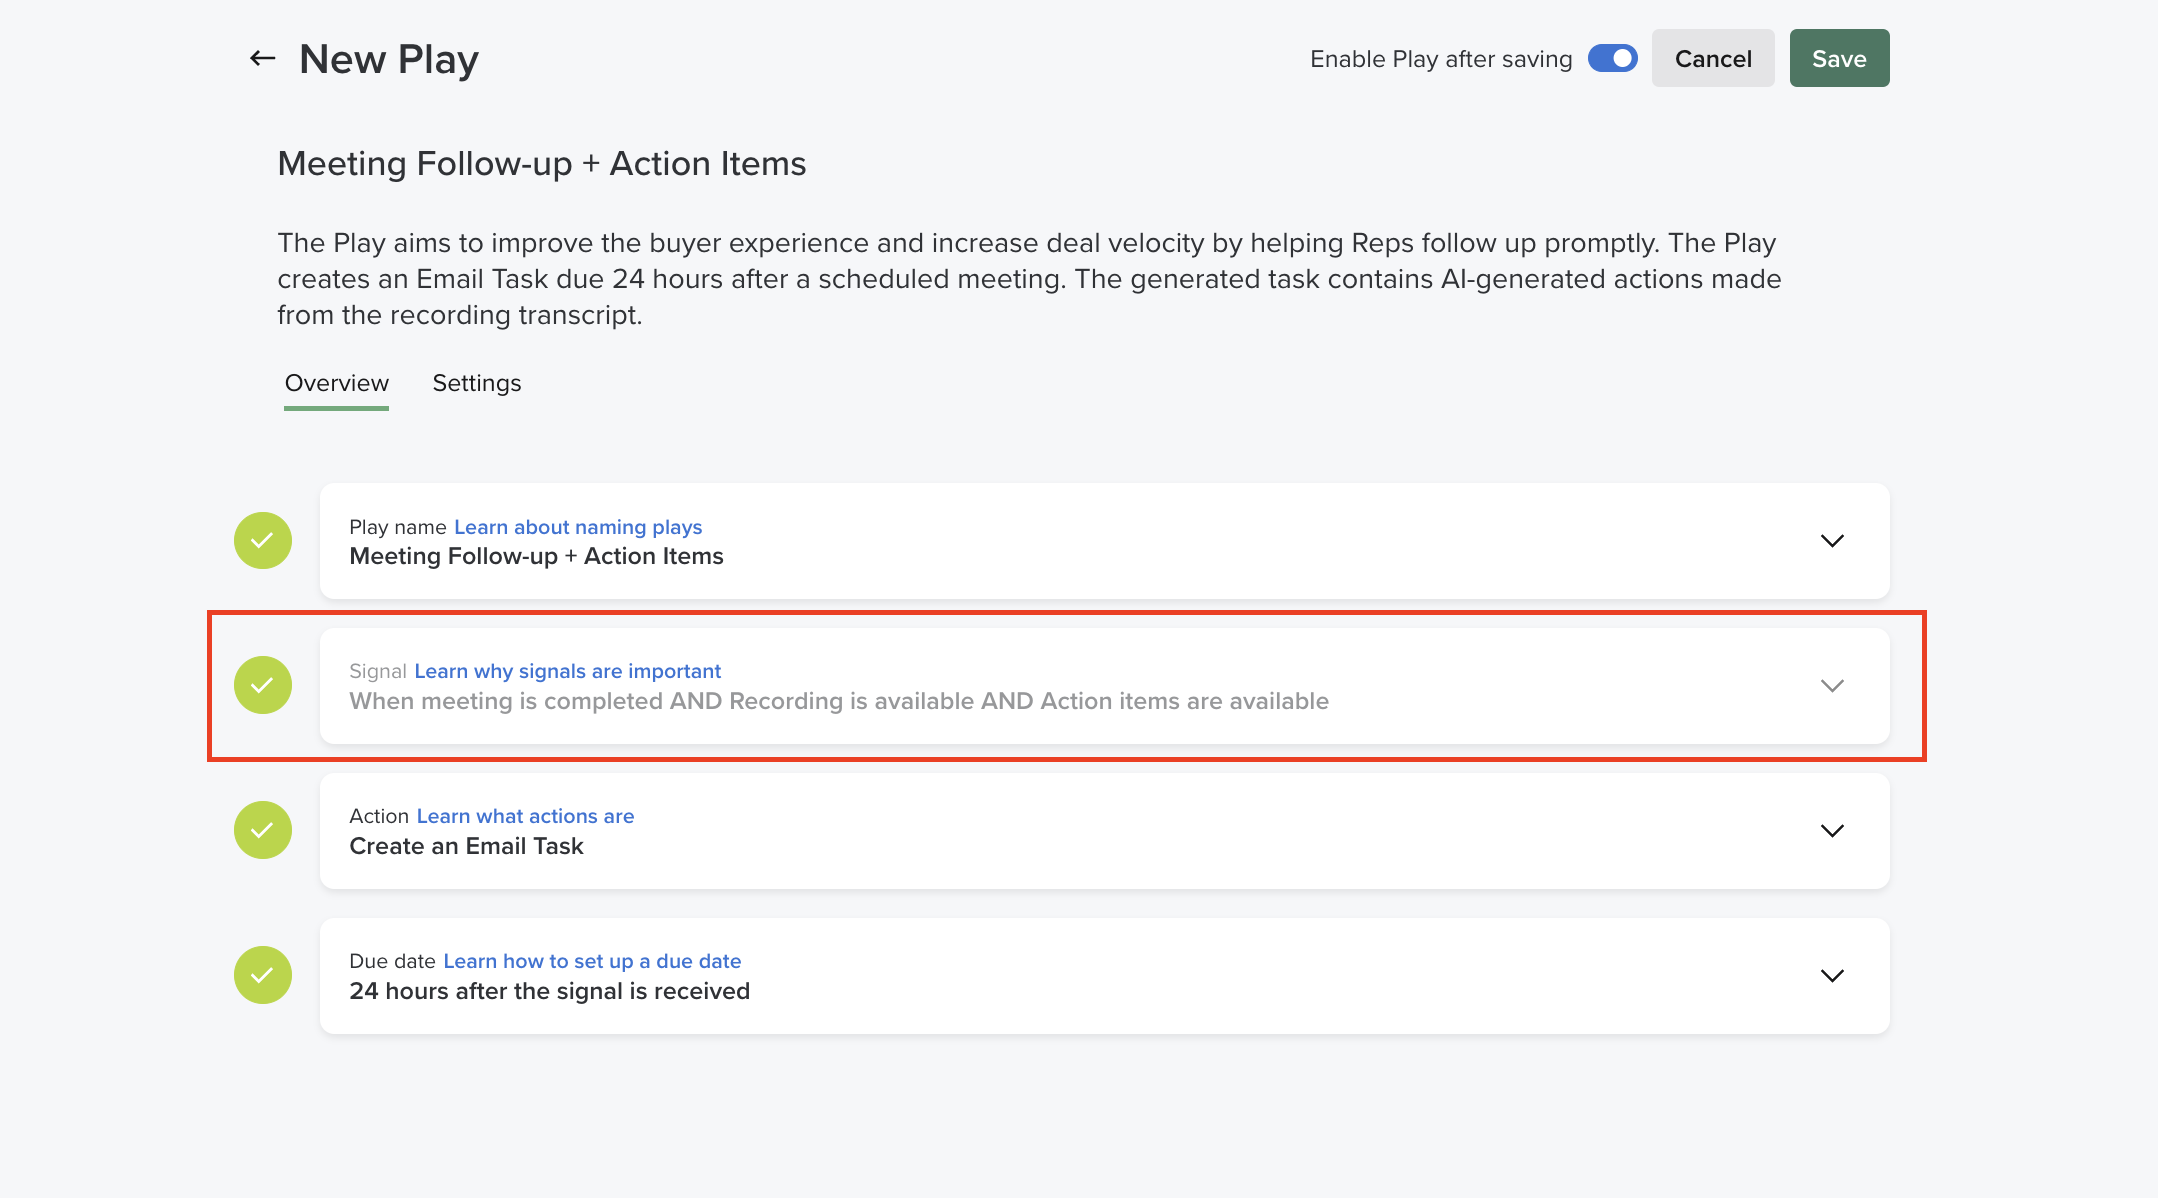
Figure 3: Review the Play signal.
Signal Criteria is an additional standard or rule(s) that Salesloft can use to qualify a signal before triggering the action.
While signals alone provide valuable data, supplementing them with additional criteria ensures that actions are taken only when the prospect's engagement demonstrates a more qualified and actionable level of interest.
To set the criteria, follow these steps:
- Open the Signal Criteria dropdown: Click Signal Criteria to open the dropdown section.
- Click +Add Criteria: Click the +Add Criteria button. A dropdown field will appear.
- Select your Signal Criteria logic: Click the dropdown field to select your Signal Criteria logic. You can choose from the following options:
- Choose your Signal Criteria subject: Click the dropdown field that appears to select the subject of your criteria. The options will vary based on the Play type.
- Things to Note: Both default and custom fields are available in the dropdown.
- Select a Play Criteria Operator: Once you select your Signal Criteria subject, additional fields will appear. In the second (middle) field, choose a Play Criteria Operator. The options will vary based on the Play type and criteria subject.
- Enter Criteria Value: In the third field, enter a value or click the dropdown to select an option.
- Things to Note:
- If you choose Is Null or Is Not Null, the third field will be automatically removed.
- For an in depth understanding of each field, check out our Developer's Portal.
- Add Additional Criteria or a Subgroup: Once you’ve added your criteria, click the ‘+’ to add additional criteria, or click the folder icon to add a subgroup. You can also remove criteria by clicking the trash icon to the right of the criteria.
After adding signal criteria to your Play signal, the next step is to set the Play action.

Figure 4: Add Signal criteria to your Play.
Play Actions are tasks generated in response to a certain signal. These tasks are the actions your team will perform when Salesloft receives the buyer signal. You can set the following tasks:
- Call Task
- Email Task
- Add to Cadence
- Review Record
- Time Block Task
- LinkedIn Navigator Task
In the Play Action section, you will set the Play action(s), customize a template or instructions that will be included with the task, and assign the task to a specific user or multiple users.
To set one Play Action, follow these steps:
- Click the “Action” dropdown to choose a task type: Select one of the following options:
- Add to Cadence: Prompts the task assignee to add a Person to a Team Cadence. Click the Set Instructions button to add instructions and the Select Cadence button to choose which Team Cadence you would like the Person to be added to.
- Call Task: Prompts the task assignee to call a Person. Click the Set Instructions button to add instructions for the call.
- Email Task: Prompts the task assignee to email a Person. Click the Edit Email button to configure an email draft. You can also draft an email with the help of AI.
- Things to Note: If you are creating an Email Follow-Up Play, the Edit Email button will not appear.
- Review Record: Prompts the task assignee to review the related conversation.
- Time Block: Allows the task assignee to block time on their calendar. Click the Edit Time Block button to set the amount of time you want to block off.
- Things to Note: This Task does not automatically block time off on a user's calendar.
- LinkedIn Integration Actions:
- Ask for an Introduction: Get introduced to a prospect through a mutual connection.
- Connection Request: Send a LinkedIn invitation to another person.
- InMail: Message the prospect via LinkedIn InMail
- Research: Read up on your prospect’s recent LinkedIn news or activities so you are familiar with your prospect and their company prior to your interactions.
- Click “Edit Task”: The Edit Task window will appear.
- Enter your preferred task name:
- Things to Note:
- When customizing a task name, you can use a dynamic tag like {{name}}. Salesloft will automatically replace the tag with the appropriate information—such as an Account Name like “Globex Corp”—when the task is created.
- Your existing Plays will continue to work with their original, generic task names. To use custom names, you must edit each Play individually and add the desired task name.
- Confirm additional Play steps and Save: Continue through the Play creation process to update the due date, task expiration, and share settings if necessary. Select Save to complete the process.
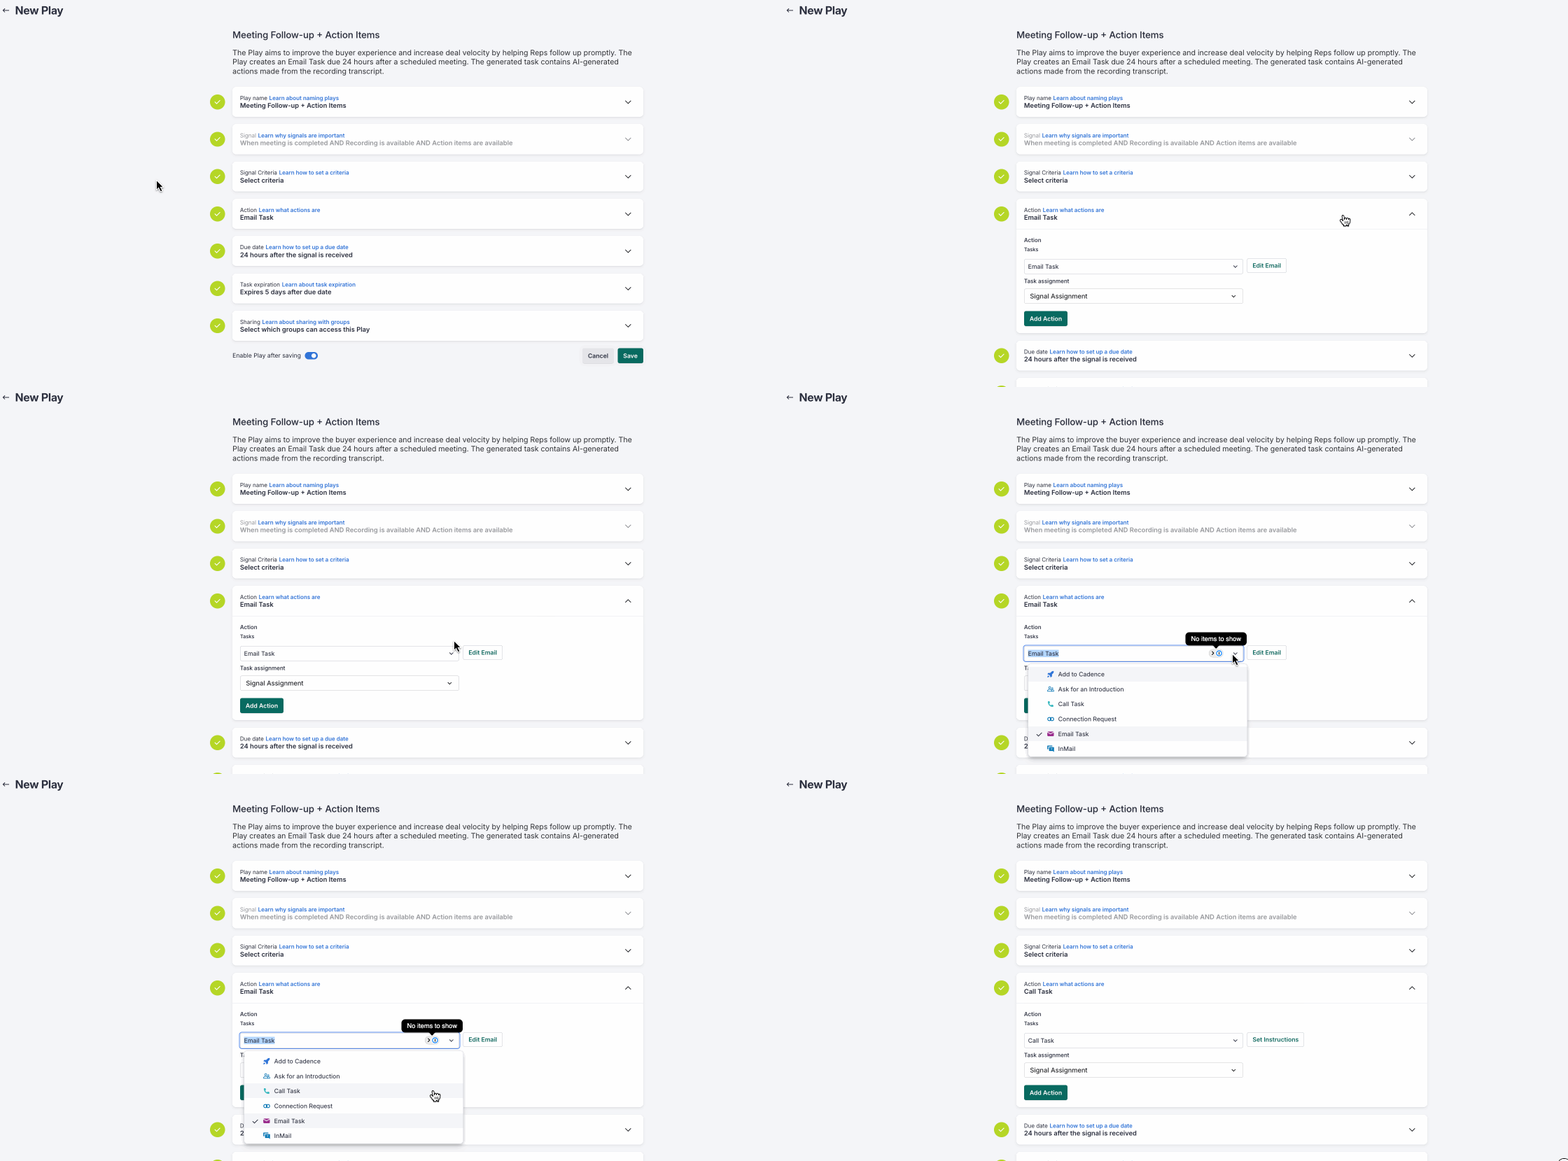
Figure 5: Gif depicting the process of assigning the Play action.
Add Multiple Actions
To provide a more comprehensive and aligned response, you may want your team to perform multiple actions in response to a single signal from buyers.
You can achieve this type of multithreaded response by adding multiple actions to a Play.
Things to Note: You can add up to three tasks to a single Play Action.
To add multiple tasks, follow these steps:
- Click +Add Task.
- Select the dropdown, then choose a task.
- Click Edit Instructions to add instructions for the task.
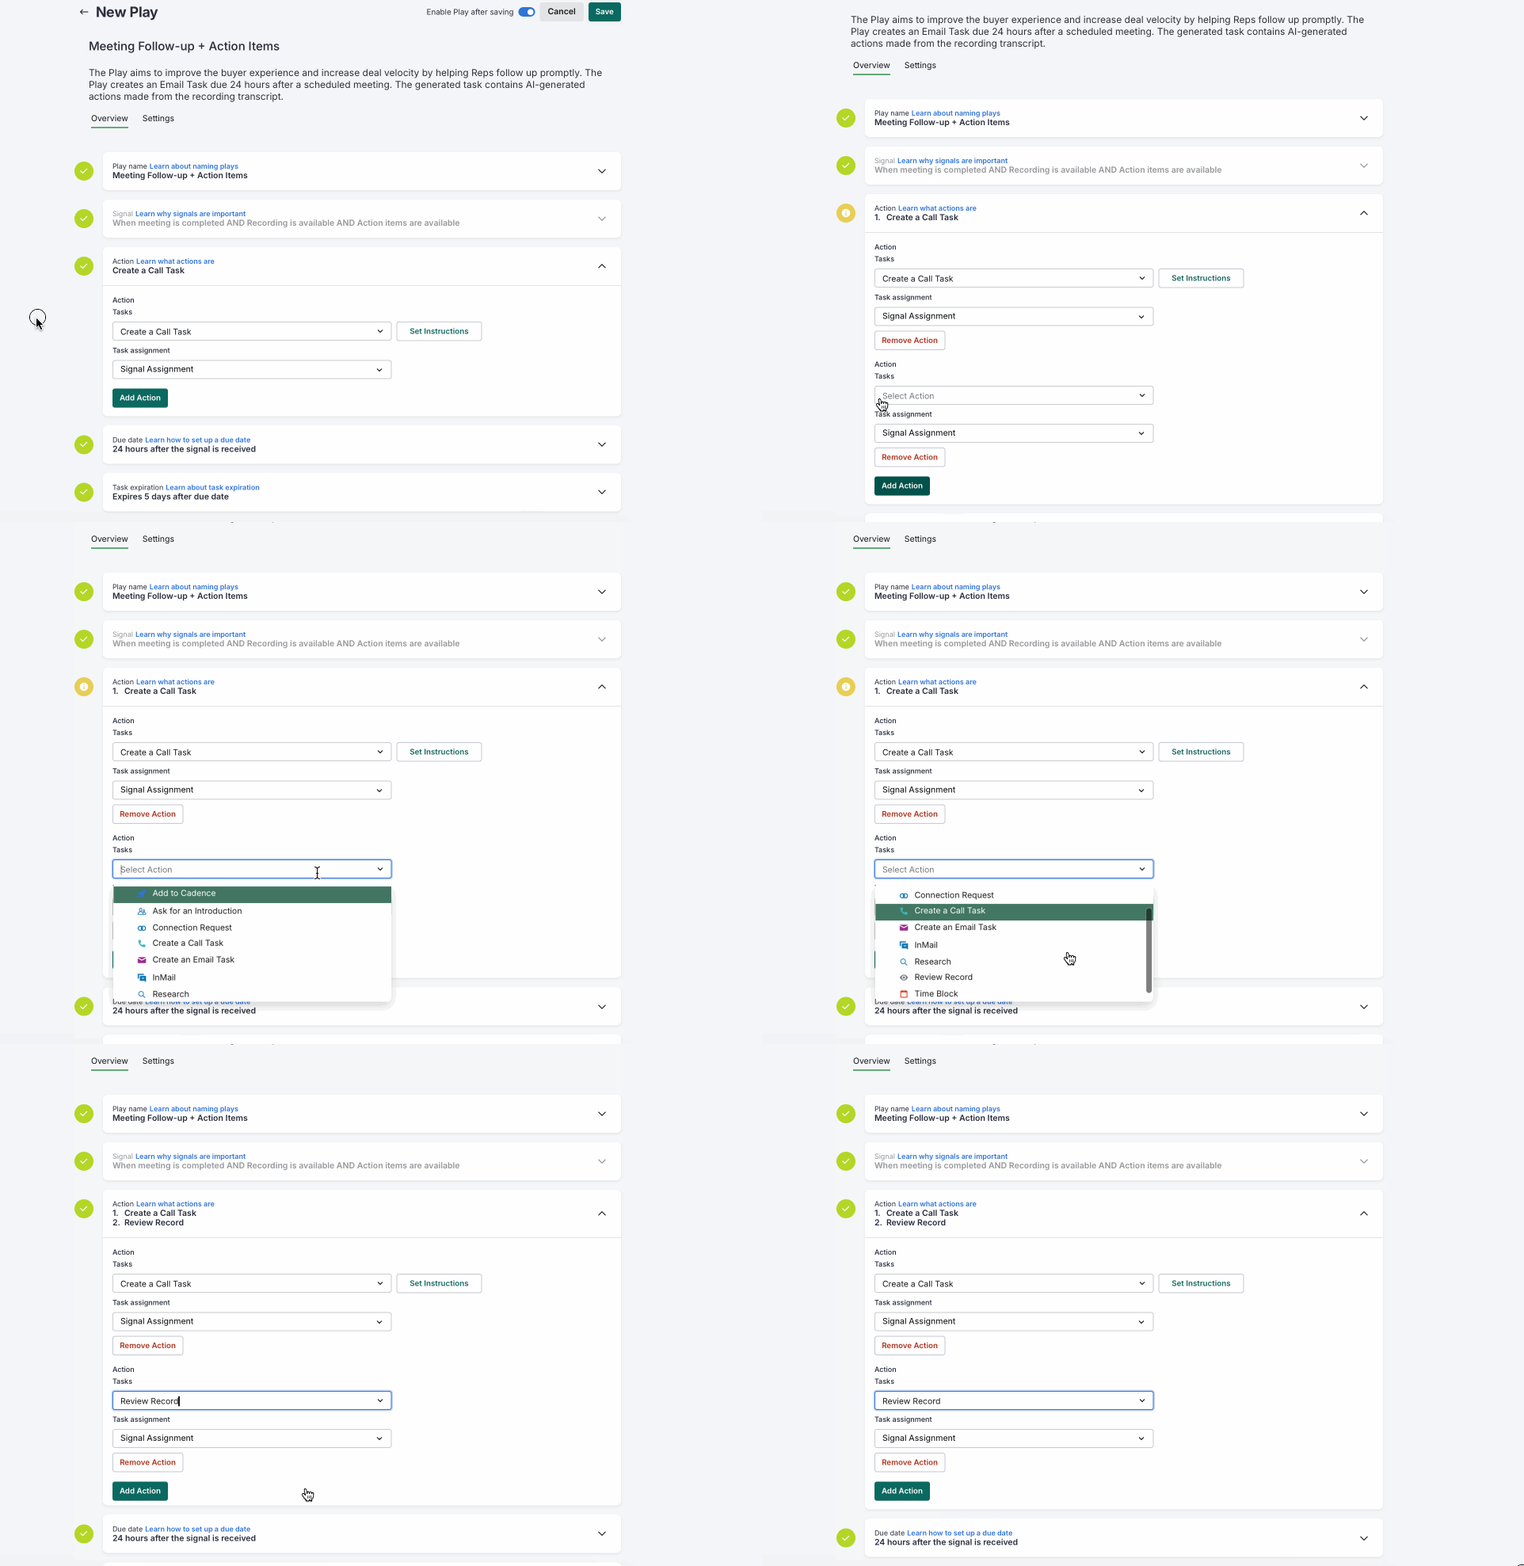
Figure 6: Gif depicting the process of adding multiple actions to the Play.
Assign the Play Action to a User
Assigning the Play Action to a user on your team allows you to specify which user should perform the task.
To assign the Play Action to a user, follow these steps:
- Click the Task Assignment dropdown, then choose from one of the following options:
- Signal Assignment: Assigns the task based on default logic from signal information.
- Things to Note: If Signal Assignment is selected for a meeting play, Salesloft will assign the task to the meeting owner.
- Record Owner: Assigns the task to the user who owns the record (Person, Account, or Opportunity)
- Record Owner’s Manager: Assigns the task to the record owner’s manager
- Account User Relationship, fallback to Record Owner: Assigns the task based on the Account-User Relationship role mapped from the CRM Account fields. If no relationship exists, the task is assigned to the record owner.
Things to Note: While the Record Owner, Record Owner’s Manager, and Account User Relationship options are straightforward in meaning, the Signal Assignment option requires deeper understanding of the signal itself. Check out the Additional Information section below to learn more about the Signal Assignment option.
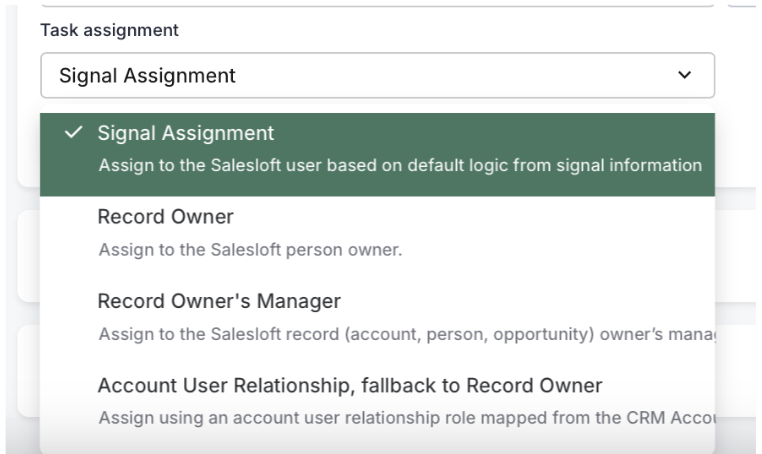
Figure 7: Assign the Play action to a User.
After setting the Play action(s) and assigning the Play action to a user, the next step is to assign a due date.
The Play Due Date assigns when the task will be due. Any assigned tasks will appear in the user’s Rhythm workflow. Due Dates promote timely interactions.
The time periods may vary based on the type of Play. For example, a Meeting Reminder play would be suggested before your event (the meeting), whereas and Meeting Follow-up would take place after the meeting.
Things to Note: If a new meeting is created and the start time of the meeting is less than 24 hours from the Play, no task will be created.
When creating a play, you can select from the following Due Date options.
- 0 Hours: Means the task is due the day the signal is received.
- 24 Hours before or after the signal is received.
- 48 Hours before or after the signal is received.
After assigning a due date, the next step is to set the task expiration.
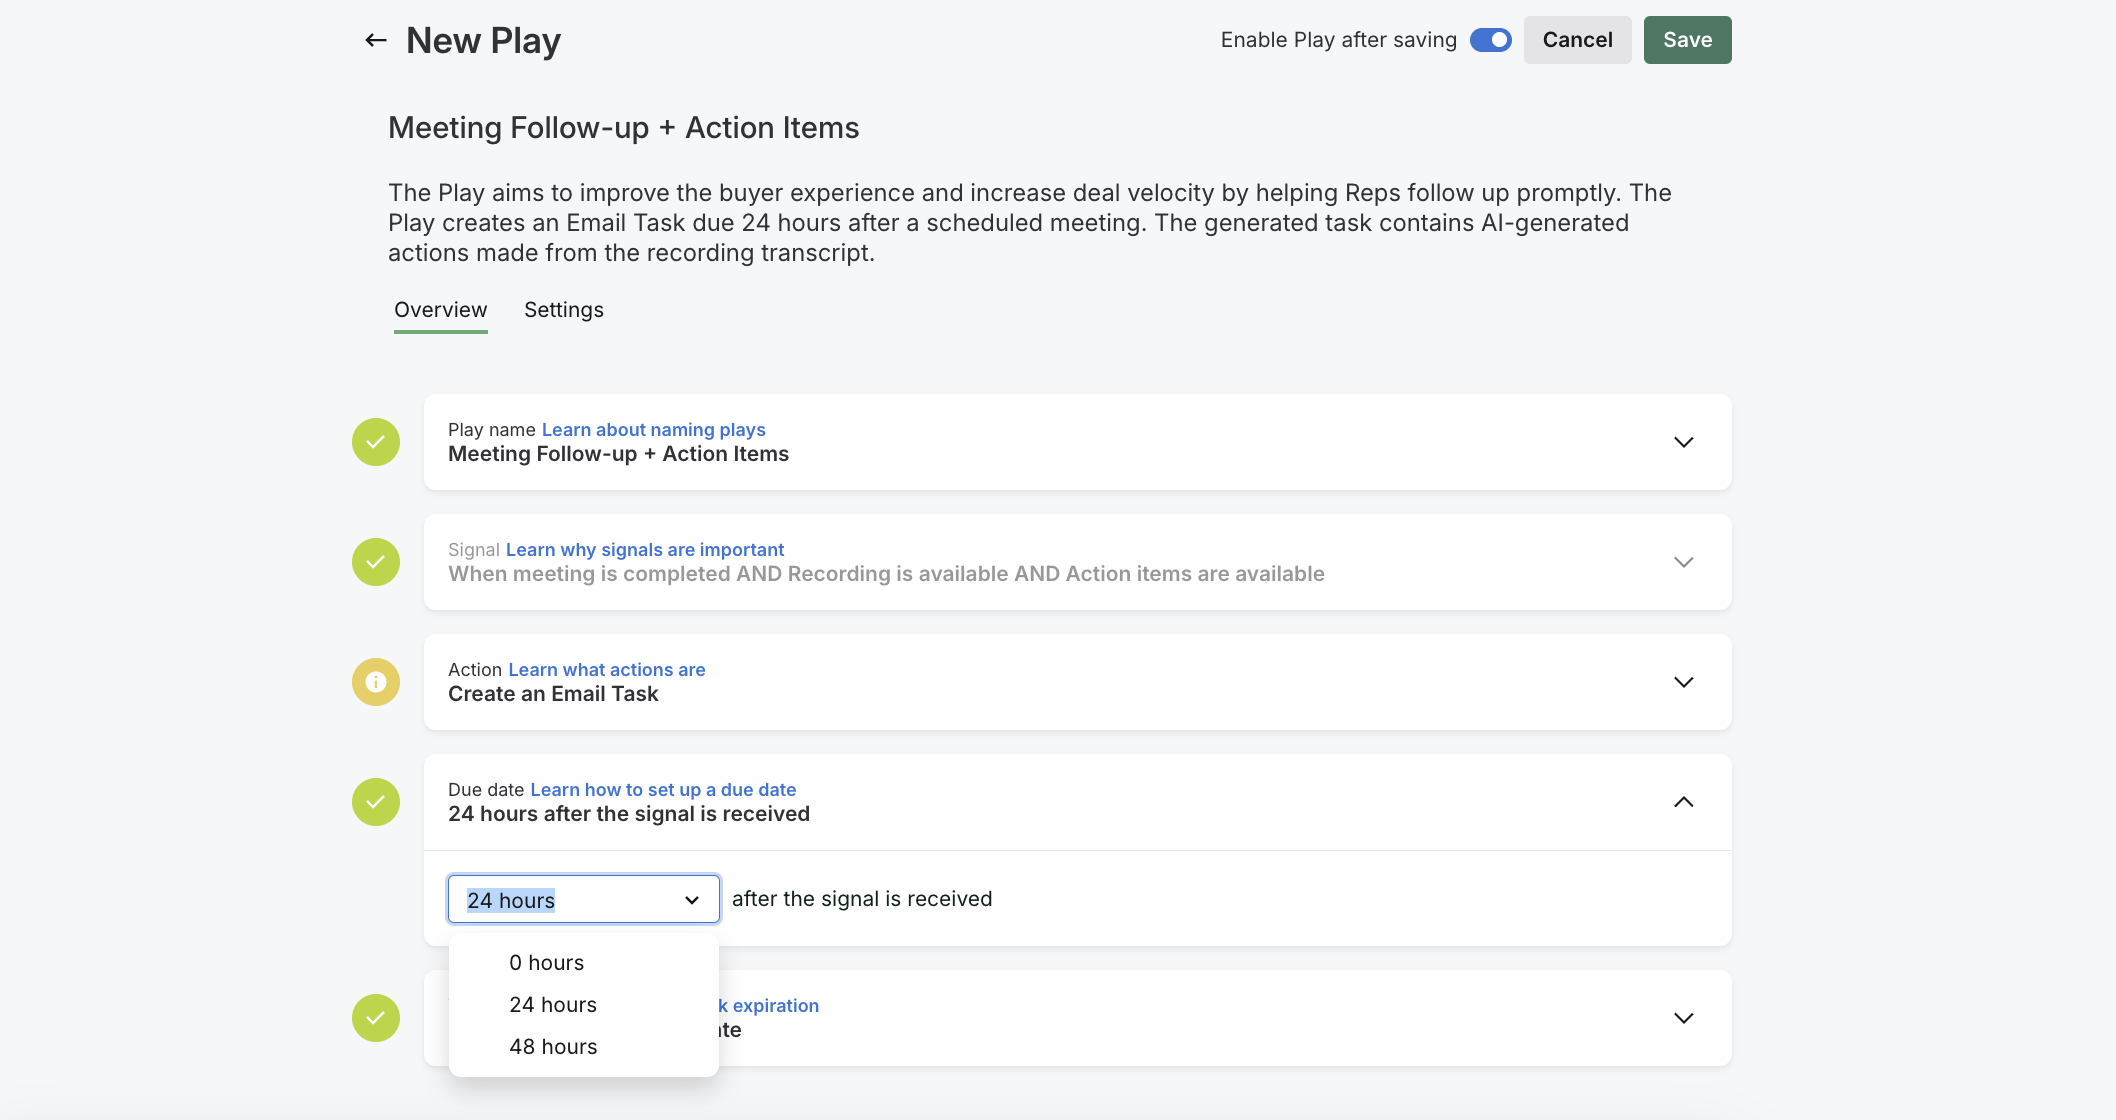
Figure 8: Assign a due date.
Task Expiration allows you to determine how long after the due date a task will expire.
When a task expires, it will no longer appear on the Rhythm Dashboard or on the Person’s Profile Page. This ensures that lingering tasks are removed from the Rhythm queue and gives you better insight into your team’s Play adoption.
To set the task expiration, follow these steps:
- Click the Task Expiration dropdown.
- Select the dropdown field.
- Choose a timeframe for the task to expire. You can choose between 1 - 7 days after the due date. You can also choose no expiration to keep the task from ever expiring.
After setting the task expiration date, the next step is to share the Play with groups.
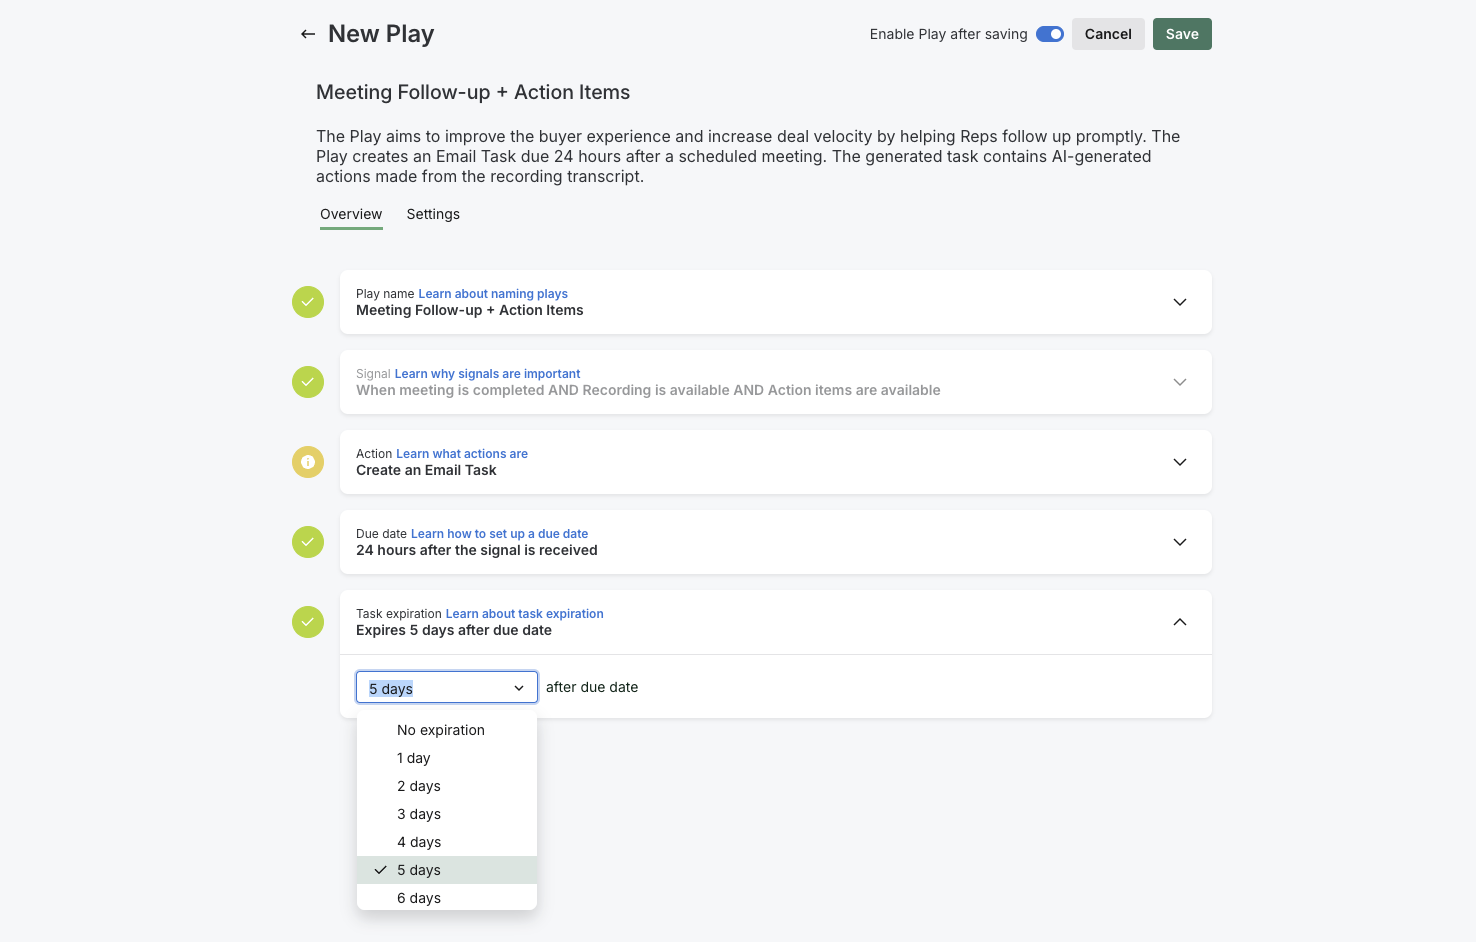
Figure 9: Set the task expiration.
Each user on your team likely uses Plays differently based on their role and workflow. When creating a Play, you can activate it for a specific group(s) to meet the needs of everyone in your organization.
To activate a Play for a group, follow these steps:
- Click the Sharing dropdown.
- Use the search bar to enter the name(s) of groups you would like to activate the Play for. Check the box(es) beside the groups as they appear.
After sharing the Play with groups, the next step is to enable the Play.
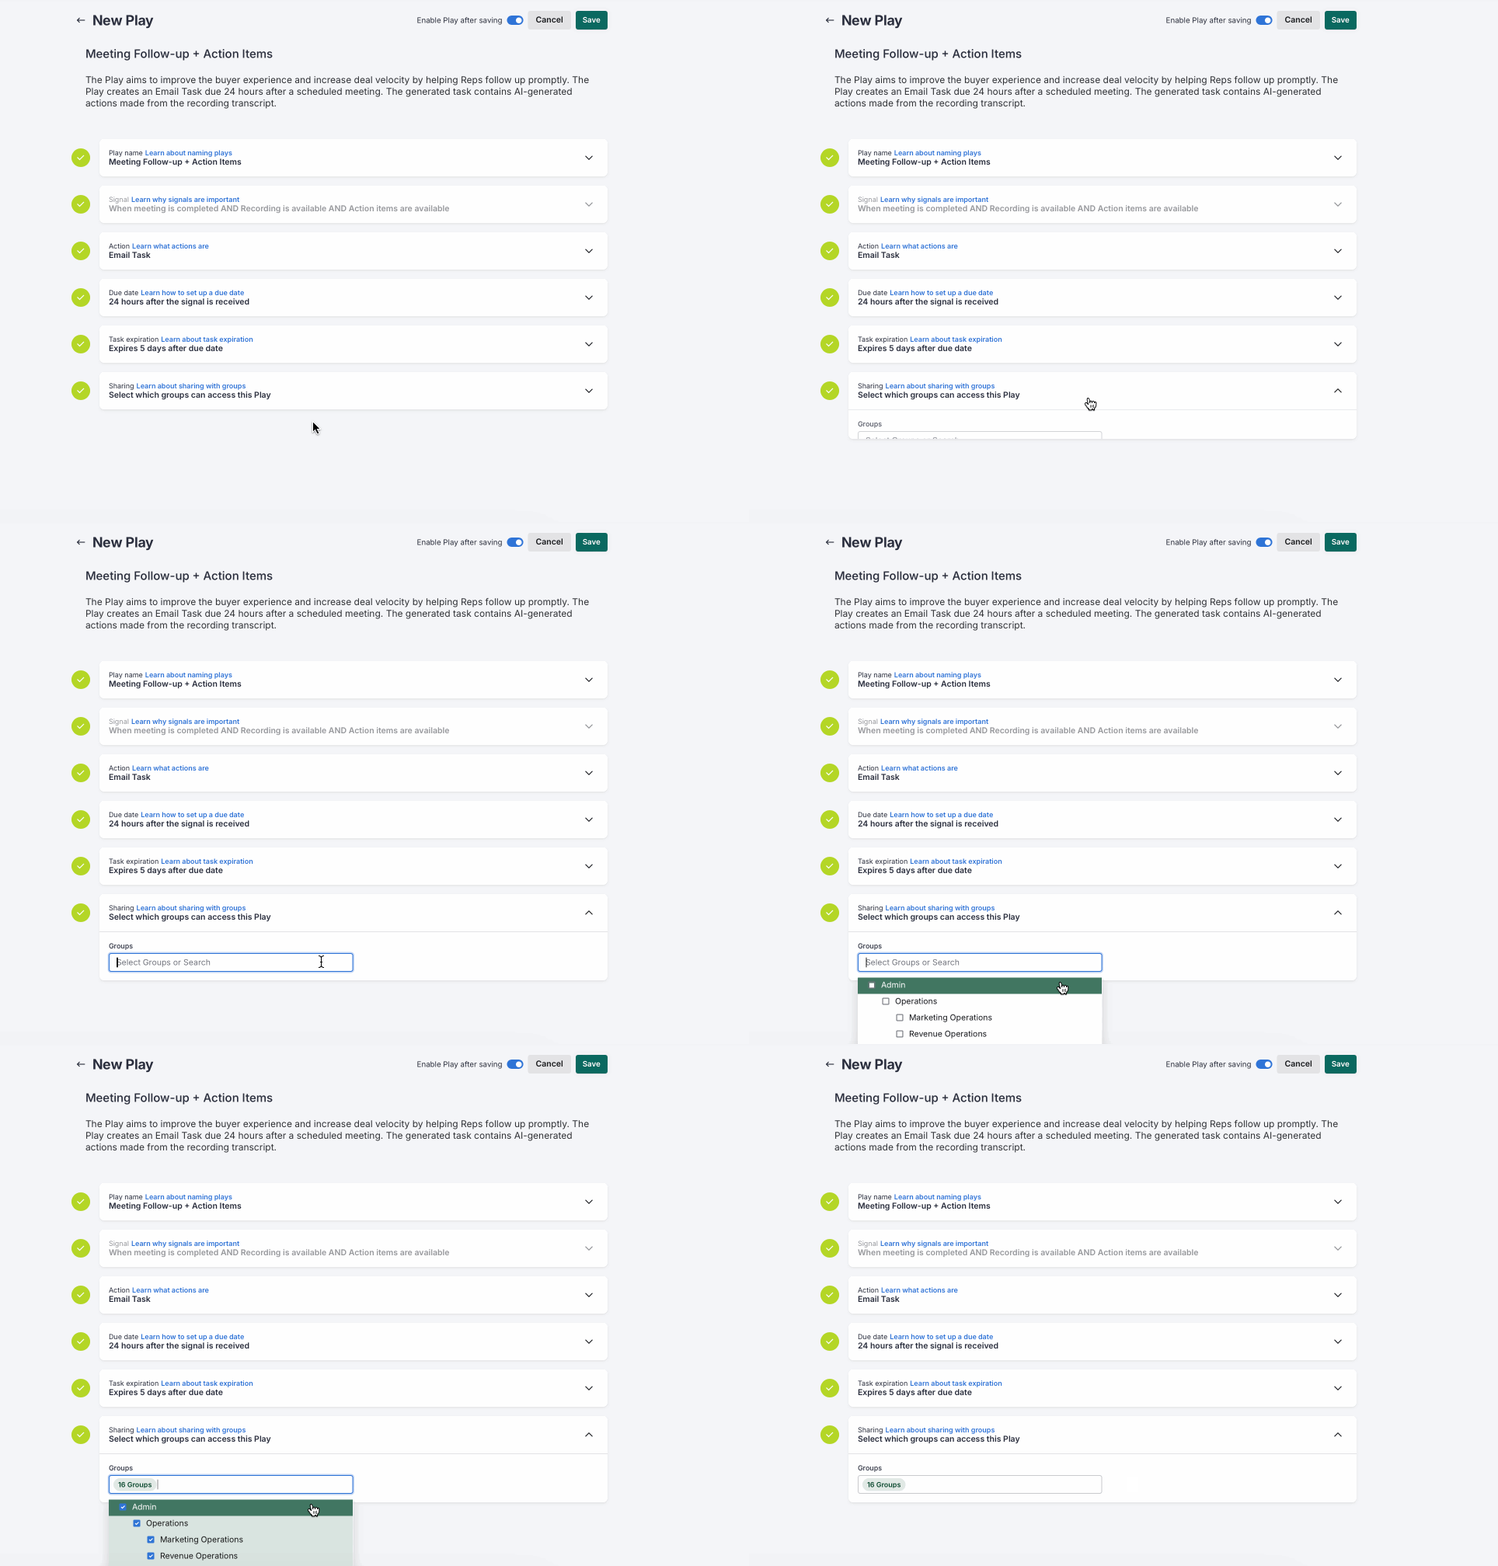
Figure 10: Gif depicting the process of sharing the Play with Groups.
As soon as you’ve confirmed your Play settings, you can select whether or not you want to enable the Play as soon as you hit Save.
Before you save, check the Enable Play after saving option found in the upper left corner of the New Play page, to the right of the Save button. When the toggle is on (blue), the Play you create will start to work as soon as it is created or saved.
All Plays are disabled by default and the toggle shows as gray. You can enable a Play that has not been enabled from the Play Settings. This is beneficial if you want to confirm additional settings or wait to enable the Play at a certain time.
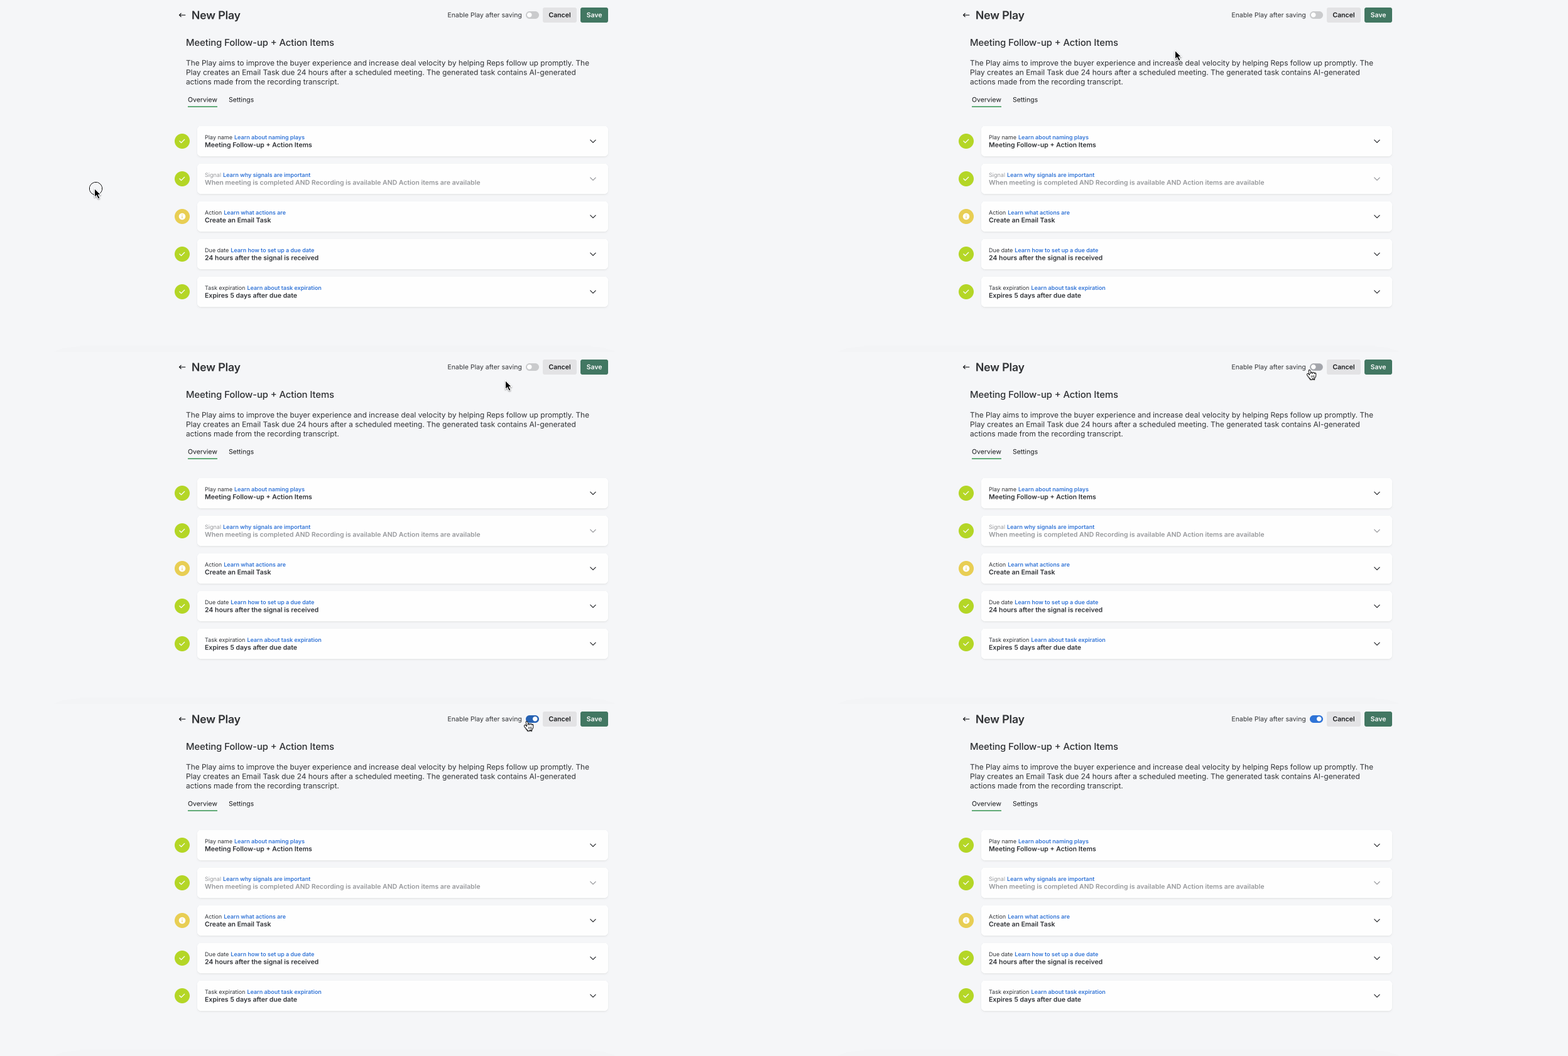
Figure 11: Gif depicting the process of enabling the Play.
Using business days when scheduling
When firing Task for Plays, if a Play is set to honor business days and a signal happens on a weekend, the task will shift forward to a weekday.
Understanding Signal Assignment
A Signal is an actionable piece of information or cue that indicates a potential opportunity. In this case, Signals refer to buyer actions or behaviors that indicate their interest or intent to engage further in the sales process.
The Signal Assignment option allows Salesloft to use attribution logic to prioritize the most relevant user for the task. There are a number of data combinations that Salesloft uses to attribute signals to a user. These include:
- If the signal contains person and user information:
- The task is assigned to the user as that is specified in the signal.
- If the signal has opportunity information only:
- The task is assigned to the opportunity owner.
- If no opportunity owner is available, it falls back to the account owner.
- If the signal has only account information only:
- The task is assigned to the account owner.
- If the signal has only Person information:
- The task is assigned to the person owner.
- If the signal has invalid information:
After setting up your Play, here are some steps you can take to ensure it is effectively implemented and delivers the desired results: