The Genesys Dialer Integration allows your team to make Genesys calls inside Salesloft.
This integration eliminates the need for shifting back and forth between platforms, and instead enables your team to access the Genesys call pad inside Salesloft.
With this integration, whenever you go to make a call inside Salesloft, the Genesys call pad will appear. The call will take place inside Salesloft, but will be managed within Genesys’s infrastructure. This way you can access Salesloft features, like call sentiments and dispositions, but also log and manage calls inside Genesys.
As an admin, you can install and configure the Genesys Dialer Integration for your entire team. Once you install and configure the integration, each user on your team will need to link their Genesys account to Salesloft.
Things to Note:
- Enabling the Genesys Dialer Integration replaces the Salesloft Dialer with the Genesys Dialer for your entire team.
- We only support one Dialer type at a time.
- If you would like to keep your team’s existing numbers, you will need to work with Genesys to port the numbers over. You can also provision new numbers.
- Call recordings are managed within Genesys's infrastructure. Salesloft also pulls in call recordings from Genesys calls.
- Call recordings must exceed 120 seconds to appear in Salesloft Conversations.
In this article, you will learn how to install and configure the Genesys Dialer Integration, including:
The Genesys Dialer Integration offers your team to seamlessly integrate
To install and configure the Salesloft app in Genesys, follow these steps:
- Navigate to Genesys AppFoundry.
- Search for Salesloft then select Genesys Integration by Salesloft.
- Click Purchase and follow the steps to complete the purchase and install the application.
- After purchasing the application, the wizard will lead you to the Install page. Click the link on this page to install the application in your Genesys instance. You will be redirected to the Genesys Integrations page.
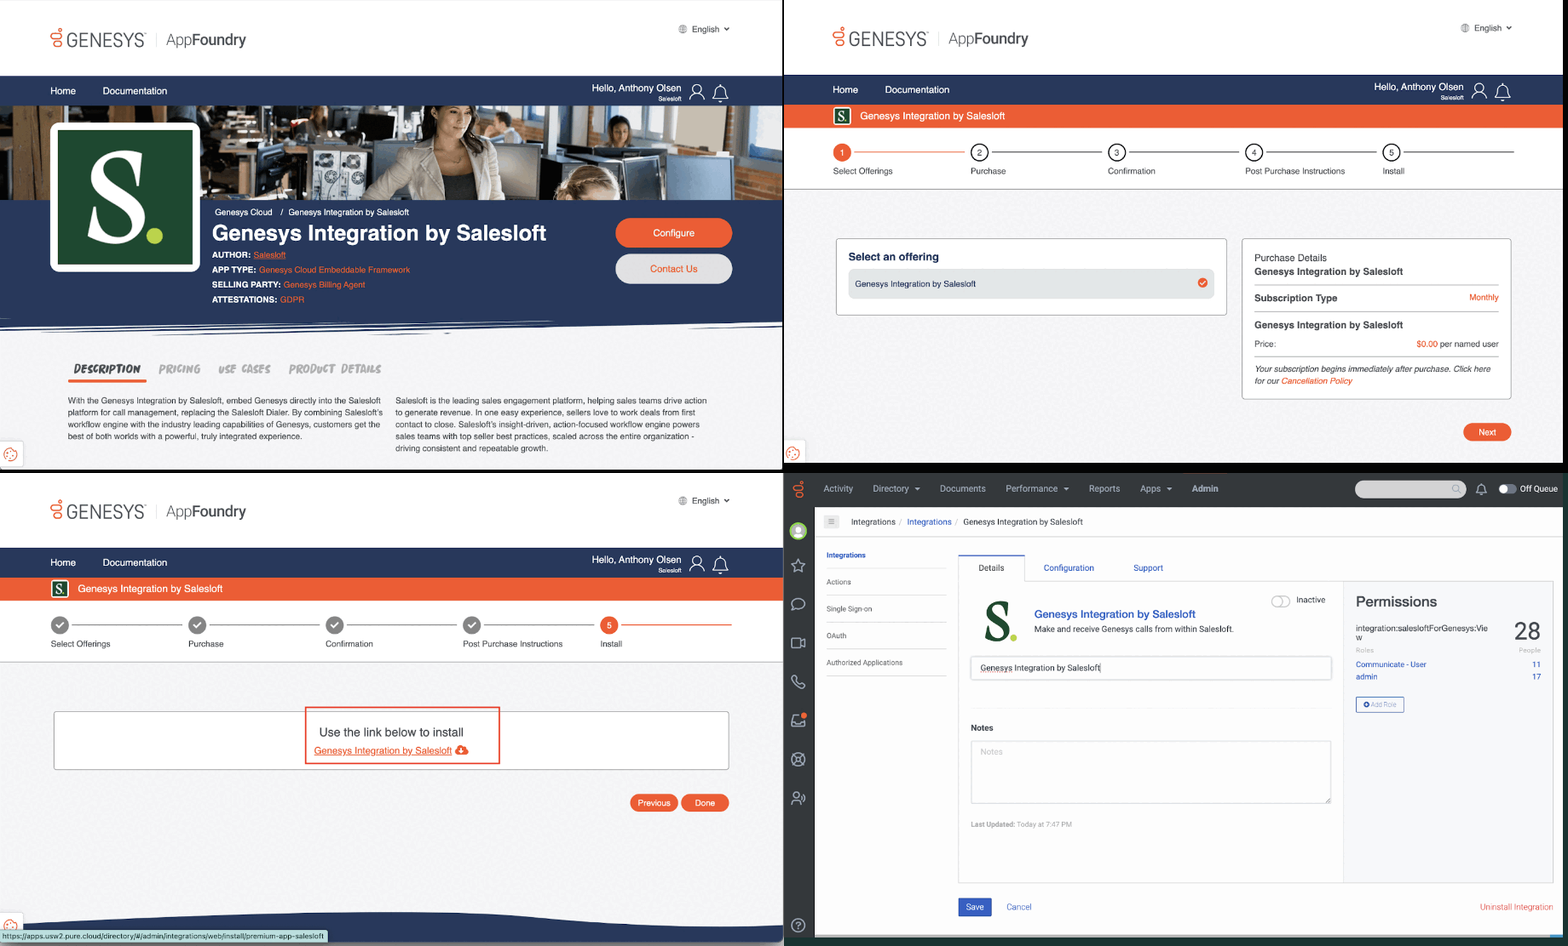
Once you’ve installed the application, you will need to configure it. Check out the configuration steps below.
Once you’ve installed the Genesys Integration by Salesloft app, you’ll need to configure the integration. Configuring the integration ensures that the integration will run smoothly for your team.
To configure the application, follow these steps:
- Purchase and install the Genesys Integration by Salesloft App. Once you purchase and install the app, you will be directed to the Genesys Integrations page.
- From the Genesys Integration page, click Add Role. Then, add the Genesys Integration by Salesloft permission to any user role(s) you desire.
- Once you’ve added the permission to your desired roles, click the toggle in the upper right corner to Activate the permission. When the toggle area is blue, the permission is activated.
- Click the Apps tab on the top menu, then select Genesys Integration by Salesloft. You will be directed to the setup wizard.
- Things to Note: Pop-ups must be enabled to complete this step.
- Complete the steps in the wizard to complete the setup and installation.
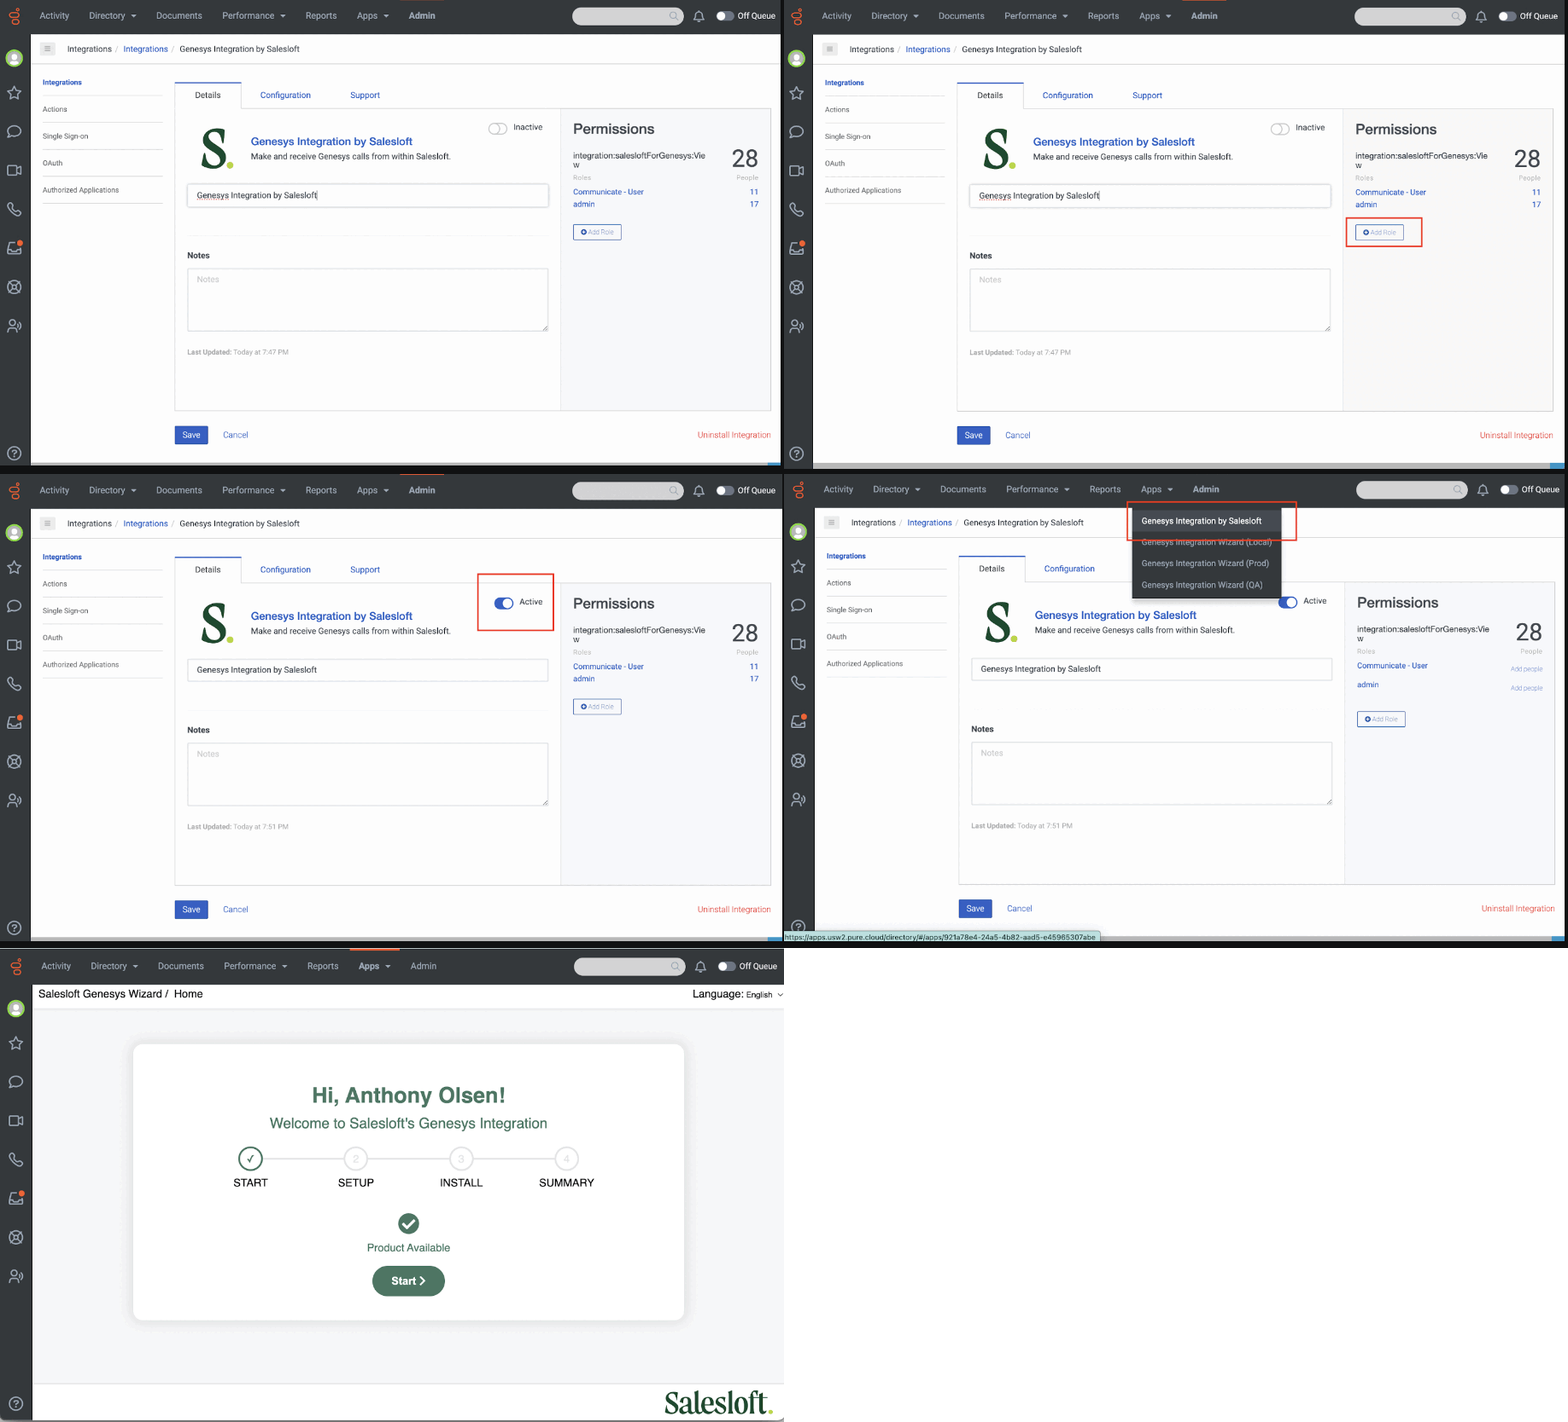
Once you’ve installed and configured the Genesys Integration by Salesloft app, each user on your team can link their Genesys account to Salesloft. For more information, check out the Connect Your Genesys Account to Salesloft article.