Team changes are inevitable, but managing them doesn’t have to be complicated. With the Salesloft Enterprise integration, you can simplify user management and navigate those changes with ease.
The Salesloft Enterprise integration connects Salesloft and Okta– enabling you to perform enhanced capabilities such as adding and deactivating Salesloft users, updating user attributes, assigning users to groups, and more via an application in Okta.
By enabling the Salesloft Enterprise integration in Okta, you can streamline user provisioning tasks, enhance operational efficiency, and increase security.
In this article, you will learn how to enable and configure the Salesloft Enterprise integration in Okta as a Salesloft admin, including:
In order to configure the Salesloft Enterprise integration in Okta, you must be a Salesloft admin.
The Salesloft Enterprise integration replaces the legacy Salesloft application in Okta. You can only use one version of the application (app) at a time.
Before you can configure the Salesloft Enterprise integration, you must uninstall the legacy app. If you do not uninstall or disable the legacy app, you may experience issues when configuring the Salesloft Enterprise integration.
To disable the legacy app, follow these steps:
- Navigate to Okta and log in as an administrator.
- In the Admin area, go to the Applications menu and click on the Salesloft application.
- Click the Provisioning tab.
- Select Integration from the left navigation menu.
- Uncheck the Enable API Integration box.
Once you’ve disabled the legacy application, the next step is to provision an API key. Check out the Provision an API Key section below for next steps.
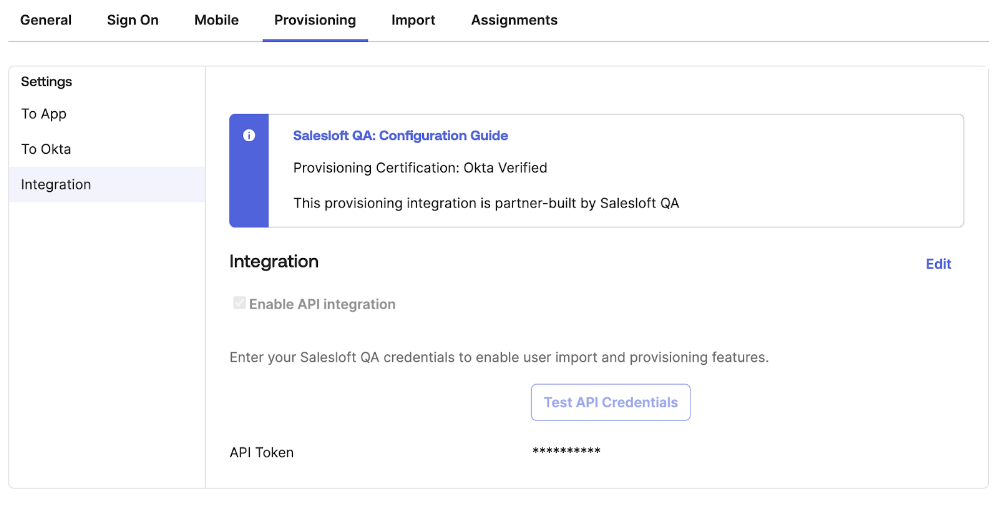
Figure 1: Disabling the Legacy Salesloft application in Okta.
To configure the Salesloft Enterprise Integration in Okta, you’ll need to provision, or, create, an API Key. An API Key is a special code that gives Okta permission to access certain data from Salesloft. You can provision your API Key inside Salesloft.
To provision an API Key, follow these steps:
- Go to accounts.salesloft.com.
- Select Your Applications. You will be directed to the Salesloft OAuth Applications page.
- Click API Key. You will be directed to the Create API Key screen.
- Enter the name of your API Key (example: “SCIM”).
- Click the arrow beside each scope type to select your scopes.
- Things to Note: The minimum required scopes are:
- Team Administration> groups:write
- Team Administration> team:delete
- Team Administration> team:read
- Team Administration> team:write
- Hit Save.
- Click <<Back to Your Apps to view your new API Key.
Once you’ve acquired your API Key, you can configure the Salesloft Enterprise integration inside Okta. Check out the Configure the Salesloft Enterprise Integration inside Okta section below for next steps.
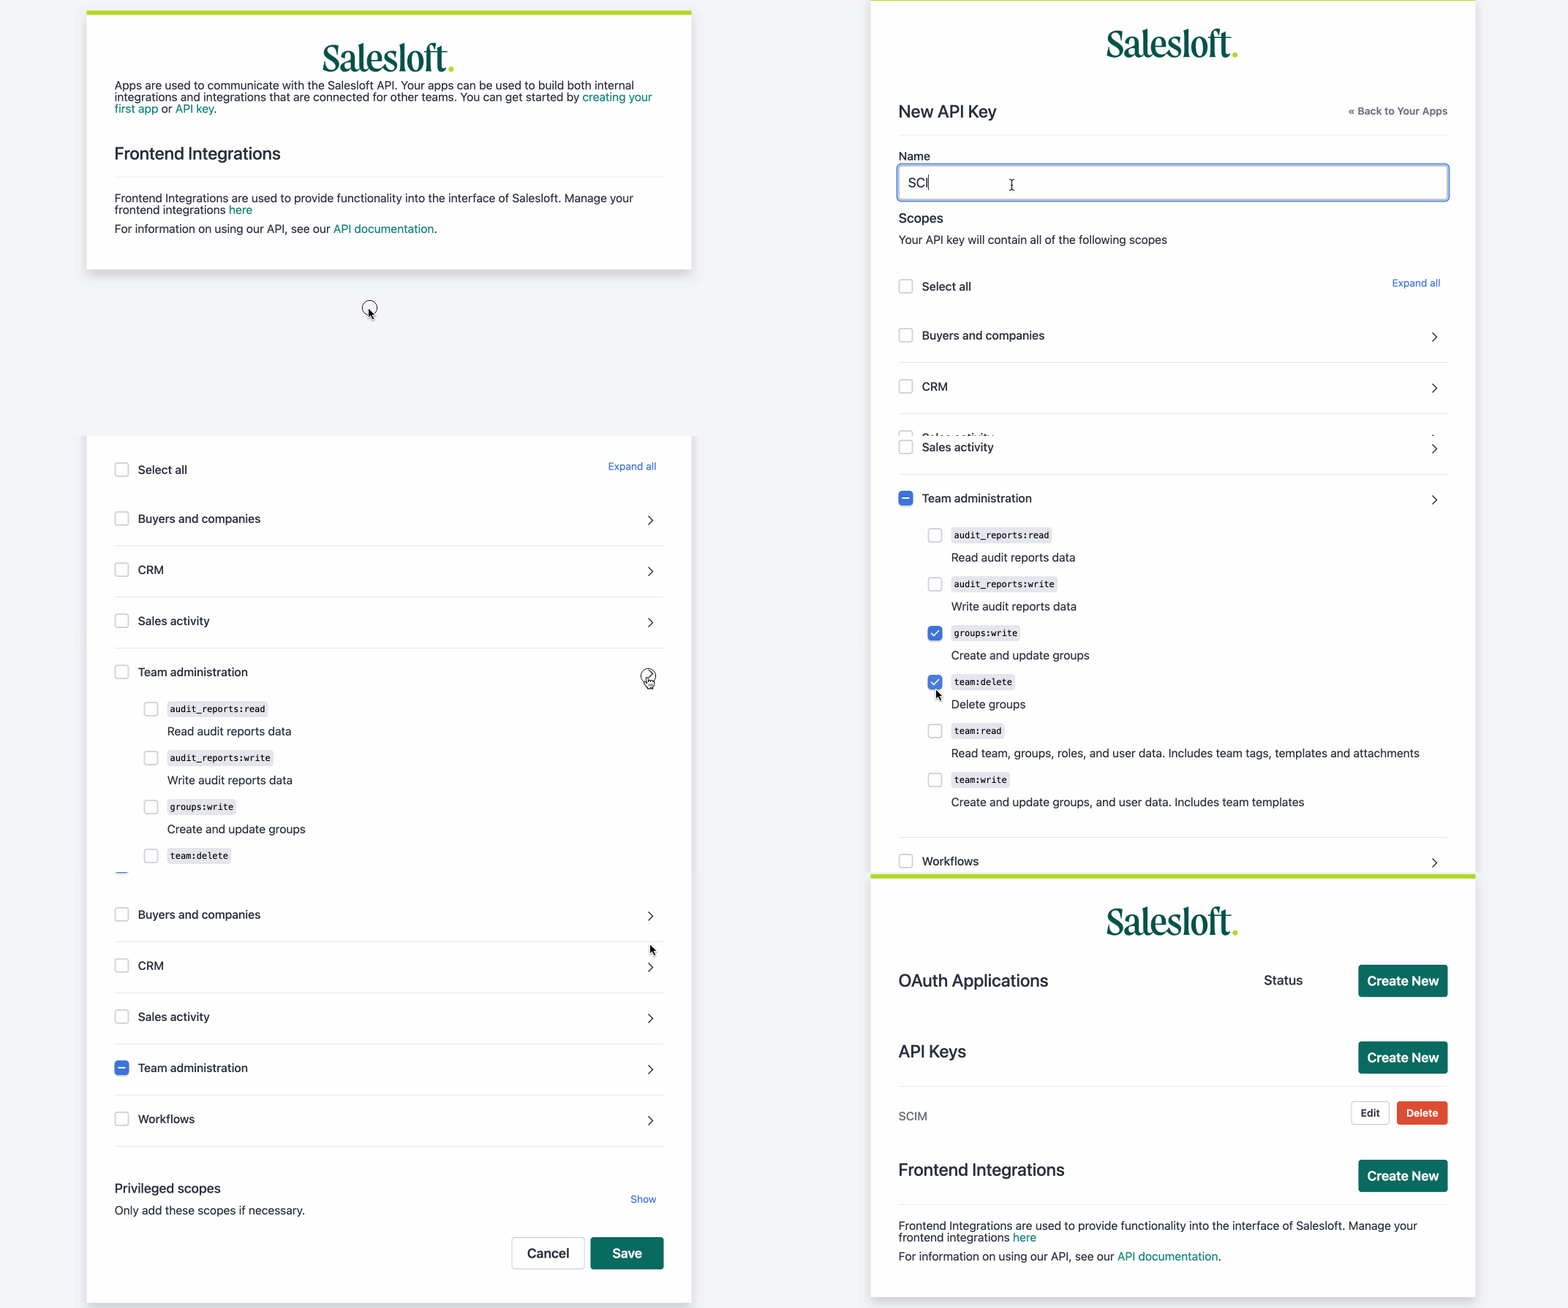
Figure 2: Provisioning an API Key in Salesloft.
Once you provision an API key, you can begin configuring the Salesloft Enterprise integration. The configuration process involves two steps:
- Enabling the Salesloft Enterprise Integration
- Activating features within the application
To configure the Salesloft Enterprise integration inside Okta, follow these steps:
- Navigate to Okta and log in as an administrator.
- In the Admin area, go to the Applications menu and click on the Salesloft application.
- Click the Provisioning tab.
- Select Integration from the left navigation menu.
- Enter the API key you have generated from the previous steps.
Things to Note: Please be sure to double check your API Key before submitting. Need a reminder, go to accounts.salesloft.com > Your Applications > API Key to locate it..
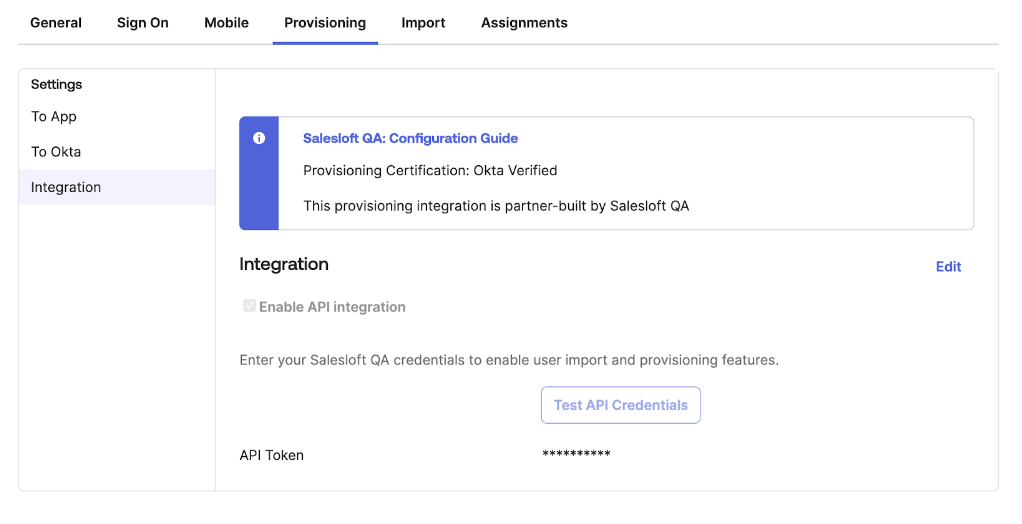
Figure 3: Configuring the Salesloft Enterprise Integration inside Okta.
Once you enter your API key, you can begin activating features for the application. This is where you will determine which user management tasks you and other Salesloft admins can perform inside Okta.
To activate features, follow these steps:
- Click To App on the left navigation panel. This will direct you to the application provisioning page.
- From the application provisioning page, click Edit beside Provisioning to App.
- Check the box(es) beside each feature you would like to enable.
Things to Note:
- To leverage the full capabilities of the integration we recommend enabling the following: Create Users, Update User Attributes and Deactivate Users.
- The Salesloft Enterprise Integration does not support updating email addresses.
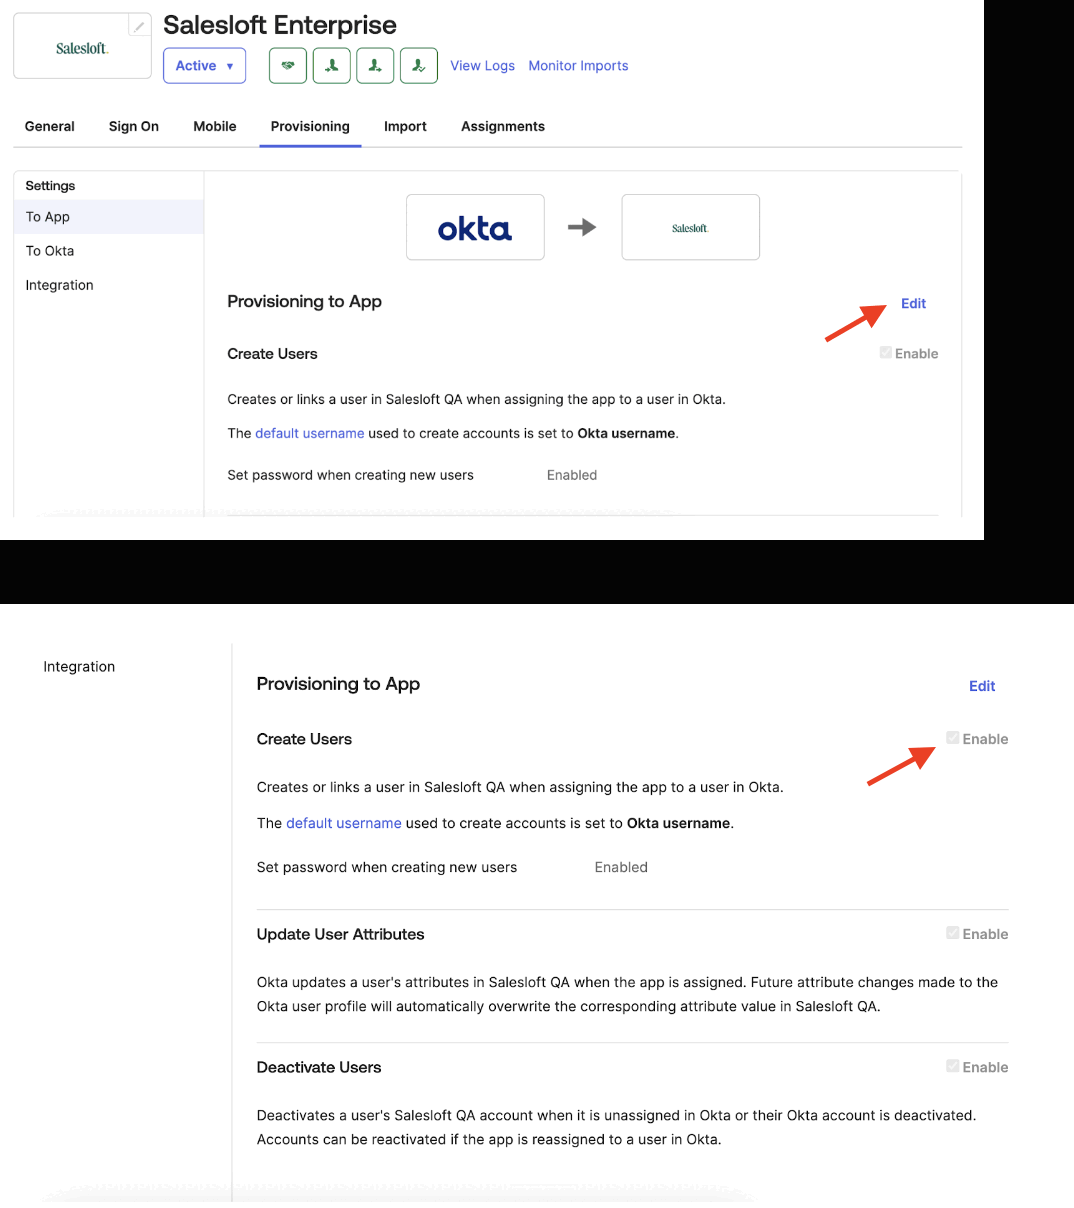
Figure 4: Activating features for the Salesloft Enterprise app inside Okta.
Assigning Okta users to the Salesloft app allows you to add individual users to the app, where you can perform user provisioning tasks.
Things to Note:
- The pre-defined configurations determine which provisioning attributes are available for the Okta users you assign.
- The Salesloft Enterprise Integration does not support updating email addresses.
To assign an Okta user to the Salesloft app, follow these steps:
- Find the Okta user who will be assigned to the Salesloft App and click Assign.
- (optional) Modify user data as needed.
- Enter the group ID.
- Hit Save.
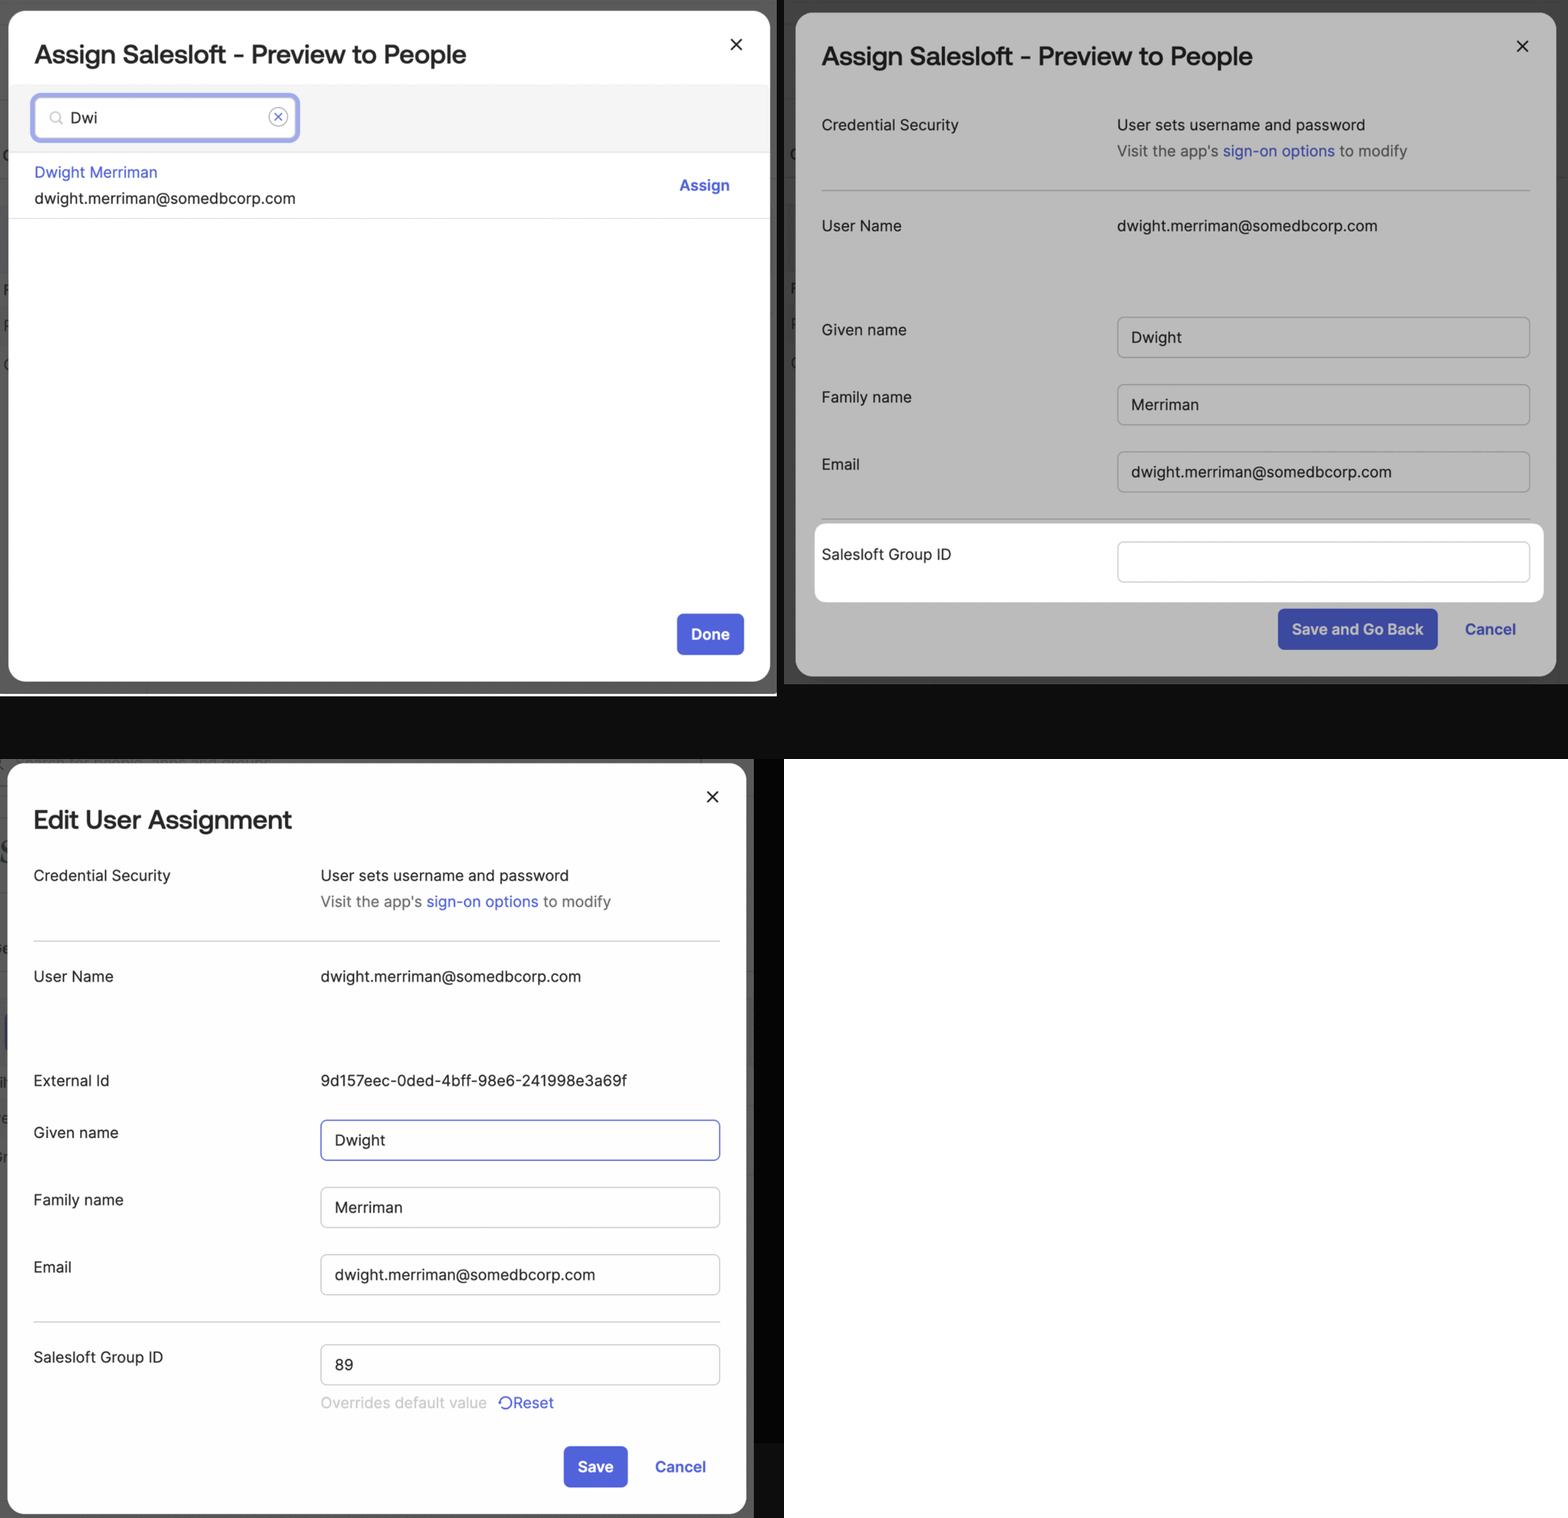
Figure 5: Assigning Okta users to the Salesloft Enterprise app.
Assigning Okta Groups to the Salesloft app allows you to add users to groups within the app, where you can perform user provisioning tasks.
Things to Note:
- Okta does not support nested groups. For that reason, the Salesloft Okta app does not allow pushing groups from Okta into Salesloft.
- The pre-defined configurations determine which provisioning attributes are available for the Okta group(s) you assign.
- The Salesloft Enterprise Integration does not support updating email addresses.
To assign an Okta group to the Salesloft app, follow these steps:
- Find the Okta group assigned to the Salesloft App and click Assign. For assistance on how to find the Okta group, check out our developer documentation.
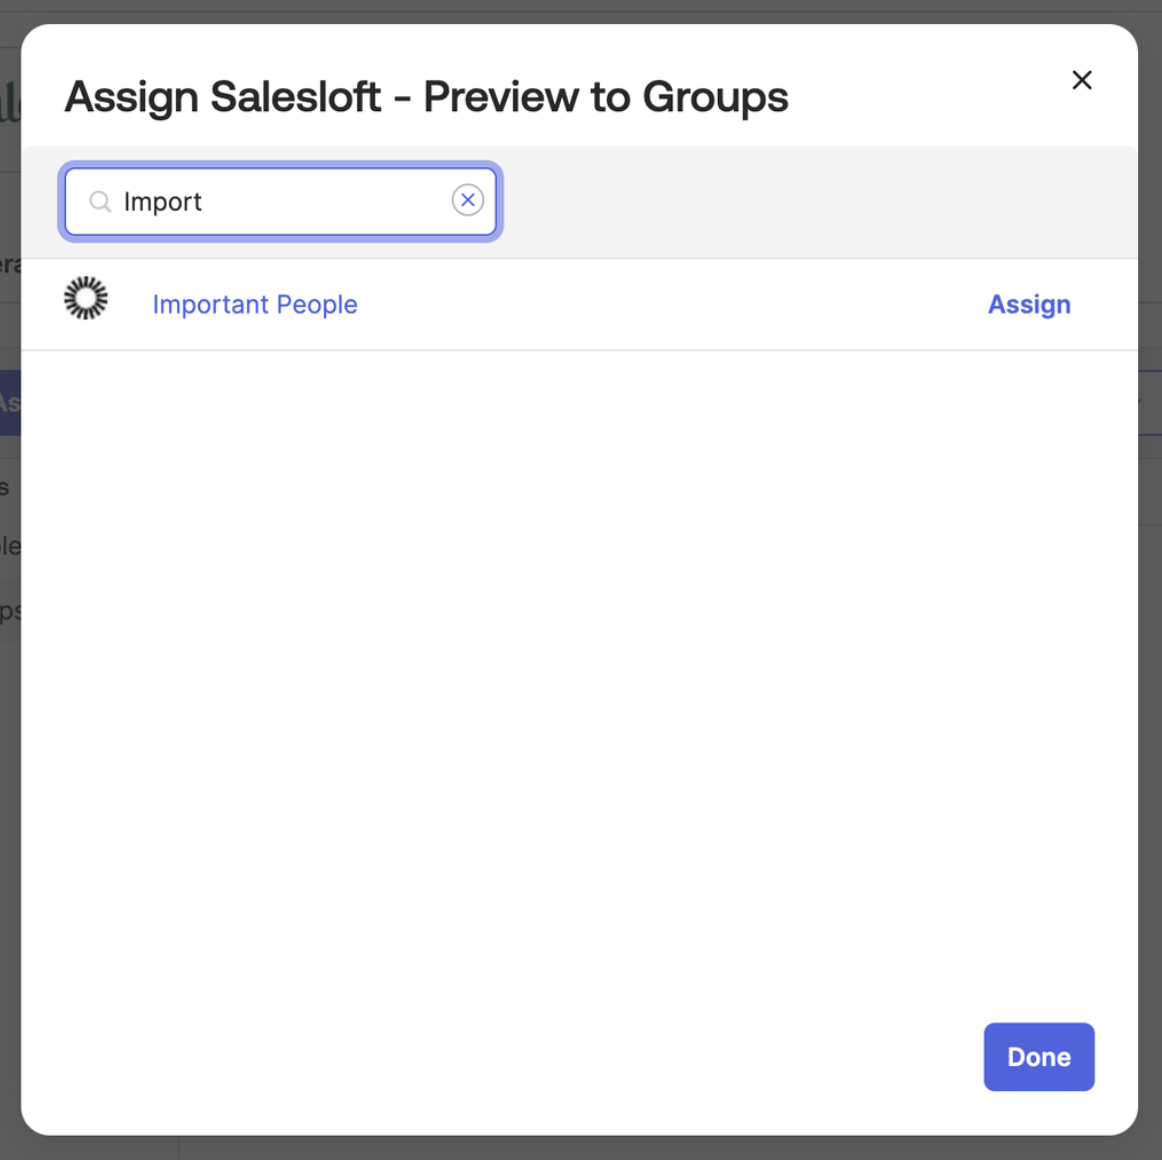
Figure 6: Searching for Okta groups assigned to the Salesloft app.
2. Enter the Salesloft Group ID.
Things to Note: The group membership will be selected upon group assignment to facilitate admin tasks.
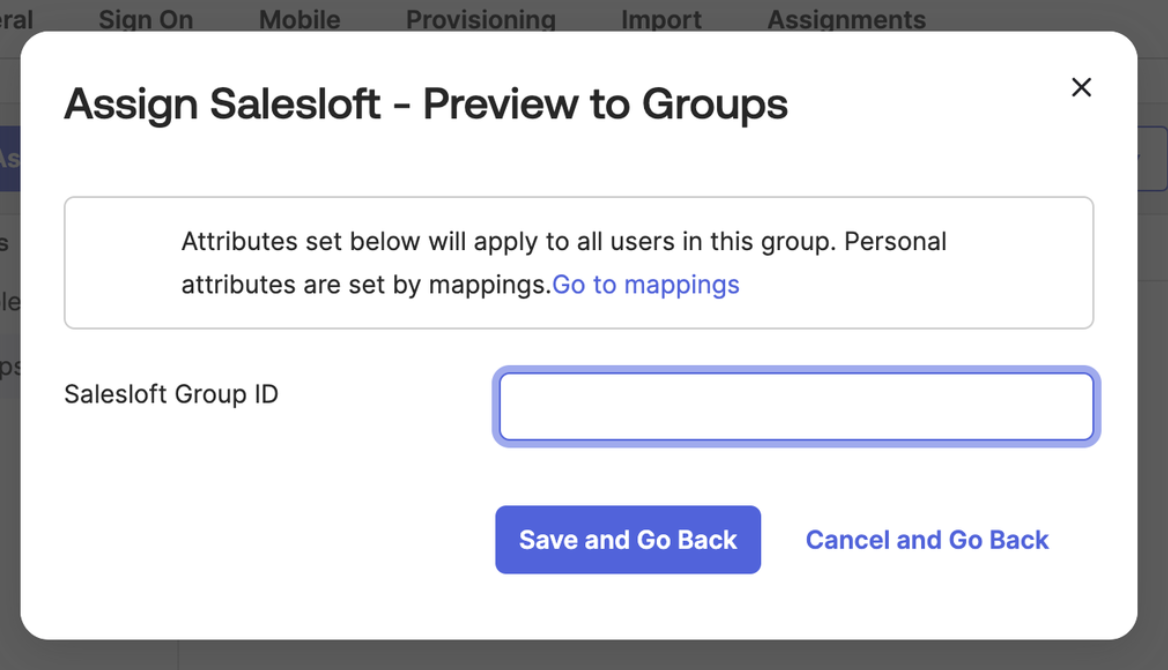
Figure 7: Entering the Salesloft Group ID to assign a group to the Salesloft app.
3. When you assign an Okta group to the Salesloft app, each member of the group will be provisioned on the Salesloft app. This means that each user will be visible in the Salesloft app, where you can perform user provisioning tasks.

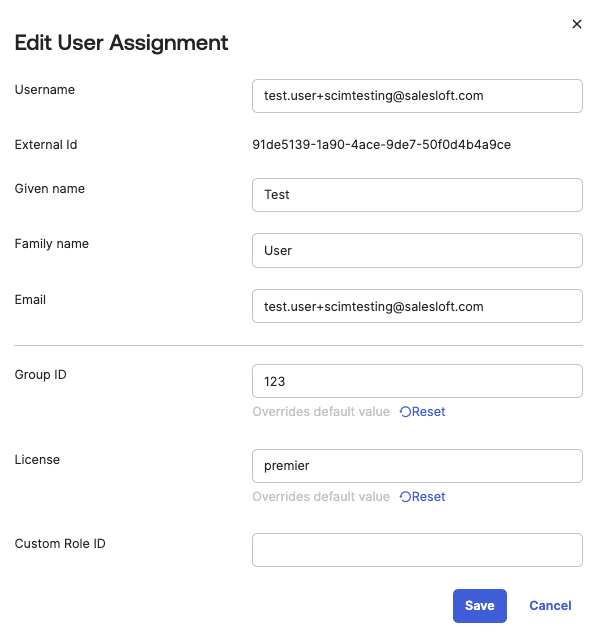
Figure 8: User assignment for the Salesloft app in Okta.
Supported Provisioning Features
The Salesloft Enterprise integration with Okta supports the following provisioning features:
- Push new users: New users created through Okta will also be created in Salesloft
- Push user deactivation: Deactivating the user in Okta will deactivate the user in Salesloft
- Update user attributes:
- Custom Roles
- License assignment
- Group assignment
- Adheres to the SCIM 2.0 specifications with the core user schema
- Leverages SCIM enterprise endpoints
Want to dive deeper into these topics, here's a list of resources that will help you learn more:
Now that you’ve successfully configured the Salesloft Enterprise integration, you can start taking advantage of its features to streamline workflows, boost efficiency, and enhance your team’s operations.
To ensure a smooth transition and maximize the integration’s value, consider these next steps:
- Share the news with your Salesloft admins. Keep your team informed about the integration’s capabilities so everyone can leverage its full potential.
- Monitor the application. Regularly review its performance to ensure everything is running as expected and address any issues promptly.