Salesloft’s meetings allow you to utilize your calendar within your engagement platform. Whether you send meeting links via an email or book a meeting on demand, you have the control to send calendar invites to the Salesloft People you need to connect with.
In this article, you will learn how to book meetings using Salesloft. This article includes:
Before you can book meetings through Salesloft, please note the following:
- To book meetings, you must have a Salesloft account with your calendar connected.
- For Salesforce CRM users, Salesloft checks meeting attendees against the Salesforce User list and will log internal attendees as Salesforce Users even if they don't have a Salesloft license.
- If a Salesforce User match is not found, Salesloft will then proceed to link the attendee as a Lead or Contact.
- This does not apply to other CRMs.
- The user who is assigned to the meeting will be shown as "Organizer" on the calendar invite, even if the event was scheduled by another team member.
- Because the meeting was booked via your calendar availability, you will automatically be confirmed as attending the meeting. You will also be listed as the meeting organizer/host. We recommend asking the Person to confirm their attendance via their meeting invite.
- You can select an alternative CRM record to log to when booking a meeting on demand. To learn more, check out our CRM Record Selection article.
- When you have the Microsoft Teams meeting link enabled and you book a meeting on behalf of another Salesloft user, your meeting link will be sent in the invite. This means, you must join the meeting in order for the Microsoft Teams link to work. This meeting link is auto-generated at the time of creation and is attached to the user who books the meeting.
- If you book a meeting from a Stakeholder in the Deals Buying Group Panel, note the following:
- Book a Meeting from the Buying Group panel does NOT require access to the Chrome Extension.
- You must have your calendar setup in Salesloft to Book a Meeting.
- If your calendar isn't connected when you click Book a Meeting, an error message will appear. In the Unable to Book Meeting window, click to cancel or click Connect to Calendar. Connect to Calendar will redirect you to the Calendar personal settings where you can connect you calendar.
- Lofting is disabled when editing recurring meetings.
- Calendars will be visible for calendars you have access to, which typically include members of your Salesloft team who have their Calendar set up. If you do not have access to a calendar, the eye icon will be grey. When you hover over the grey eye icon you will see the “You do not have access to this Calendar” message.
Watch this quick video to learn how to book a meeting through Salesloft.
Book a Meeting Instructions
The Book a Meeting module is where you will set your meeting details and send the invite. The module appears when you book a meeting on demand from the Person Profile page or the Stakeholder actions in Deals.
To book a meeting from the module, follow these steps:
- Access the Book a Meeting Module: Use one of the following methods to open the book a meeting module:
- Confirm the Meeting Owner Settings: Review the Meeting Owner settings. The settings include:
- Meeting Type: Select a Meeting Type in order to populate meeting details automatically. The meeting type is determined by a team admin. You can select between Standard or Round Robin meeting types
- User: The person booking the meeting, you will be the meeting owner by default. However, if you are booking a meeting on behalf of someone else, you can use the dropdown to assign the meeting to anyone on your team who has their calendar set up in Salesloft.
- Confirm meeting details: Each detail may be edited using the available text box. The details include the following:
- Title: Title of the meeting
- Duration: Length of the meeting in minutes
- Location: Video conferencing link. If you set up your Video Conferencing Settings, your preferred meeting link will automatically appear. Check out the Meeting Links in Your Calendar Invite article for more information.
- Things to Note: When both the Video Conferencing dropdown and the Location field are populated, Salesloft determines which link appears in your calendar invite based on your selections:
- If you set the Location field to Zoom (or a custom link), that selection takes priority over your team's Video Conferencing provider. Your invite will include a single link from the Location field.
- If you leave the Location field blank, Salesloft uses your team's Video Conferencing provider.
- If a custom address is entered, precedence is given to the Location field (displaying the custom address link)
- If the Video Conferencing dropdown is populated and the Location field's custom text is left blank, Salesloft falls back to your team's Video Conferencing provider.
- If you manually paste a video conferencing URL directly into the Description field, Salesloft CANNOT detect or remove it. To ensure your invite contains only one link, use the Location field or Video Conferencing dropdown to set your preferred provider — avoid pasting raw video links into the description.
- Regardless of your selections, Salesloft generates only one video conferencing link per invite.
-
- Custom CRM Fields: Fields that have been mapped to your team’s activity logging so you can provide additional data about the meeting. Here you may also find the Recurrence Type field which allows you to set this meeting as a recurring.
- Description: The description allows you to apply different font styles to the meeting description and use numbered or bulleted lists to make the text comprehensible and easy to read. The description box will expand to fit your text as you add to it. (includes custom fields, recurrence, description.
- Review and Add Attendees: The Attendees section is where you will add guests. When you create a meeting, the Person you are booking the meeting with will appear as the Main Guest. You can add team members and other guests by typing in their email address to invite them to the meeting.
- If you invite a Salesloft user who has their Calendar setup, you will be able to view their calendar inside the module. Salesloft will also auto-suggest email addresses when you add team members who are Salesloft users to the meeting. Once you enter at least 2 letters in the Attendees section, matching results will appear in a list below the field. Select the invitee from the suggested list or add the invitee by manually typing their full email.
- After an email address has been added, that guest will be added to the Attendees list. The Participants list contains the following details:
- Circle icon: To the left of the participant's email address, the circle icon will be in the color that indicates the color of that participant's events on the calendar.
- Attendee's email address
- Attendee’s meeting role: Below the email address, designates if the participant is the Meeting Owner, Organizer, Main Guest, or Guest of the meeting.
- Eye Icon: To the right of the participant's email address, click the eye icon hide or show that participant’s calendar in the Book a Meeting module.
- Select time on the Calendar: In the calendar interface, select a time slot for your meeting. You will not be able to select Book Meeting until a time slot is selected.
- Book the Meeting: Once all details are filled in, click Book Meeting.
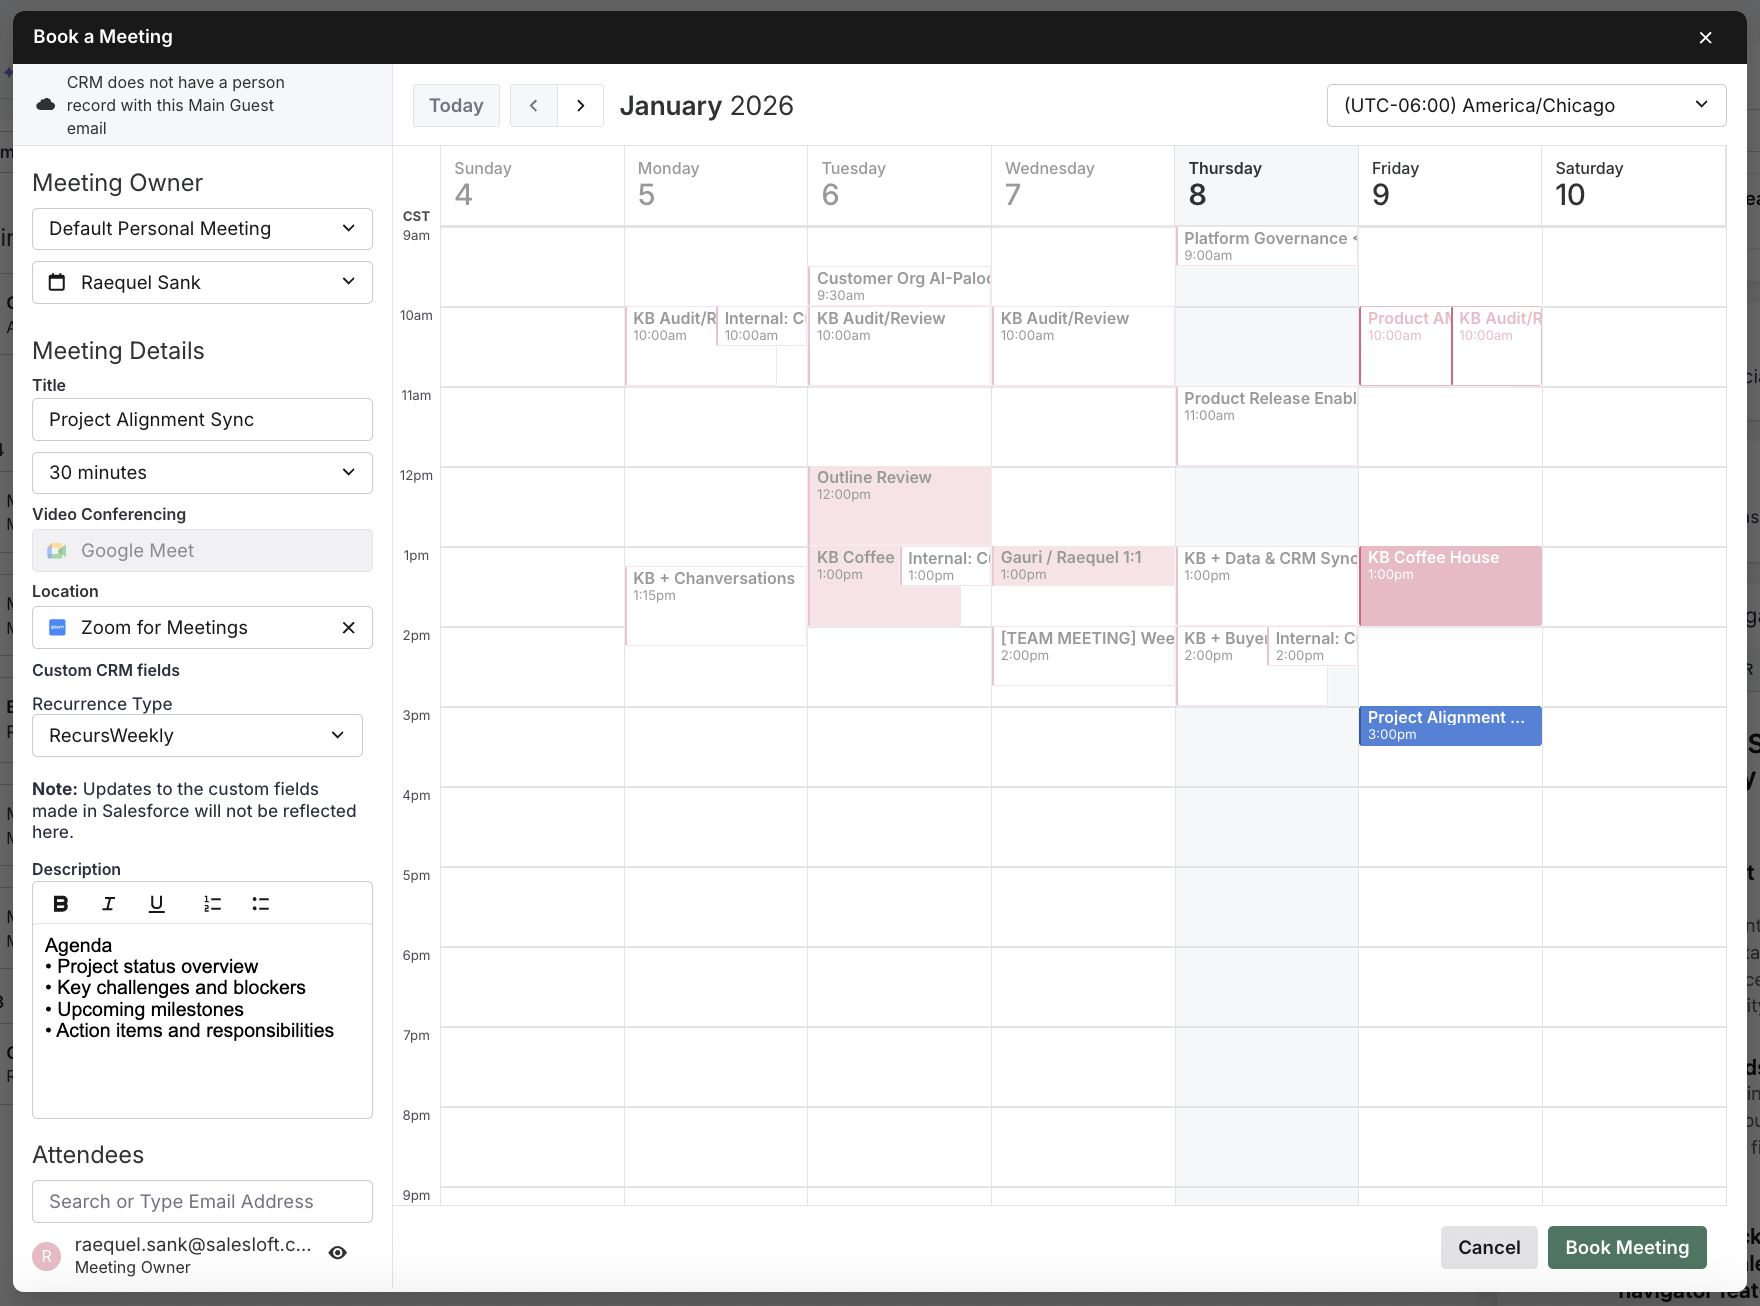
Figure 1: Example: Meeting scheduler in Salesloft.
How a Person Books a Meeting with You Instructions
Apart from setting up and sending invites, you may be wondering how people book meetings with you. Well, it all starts with an email.
Let’s walk through the steps a recipient will take to book a meeting:
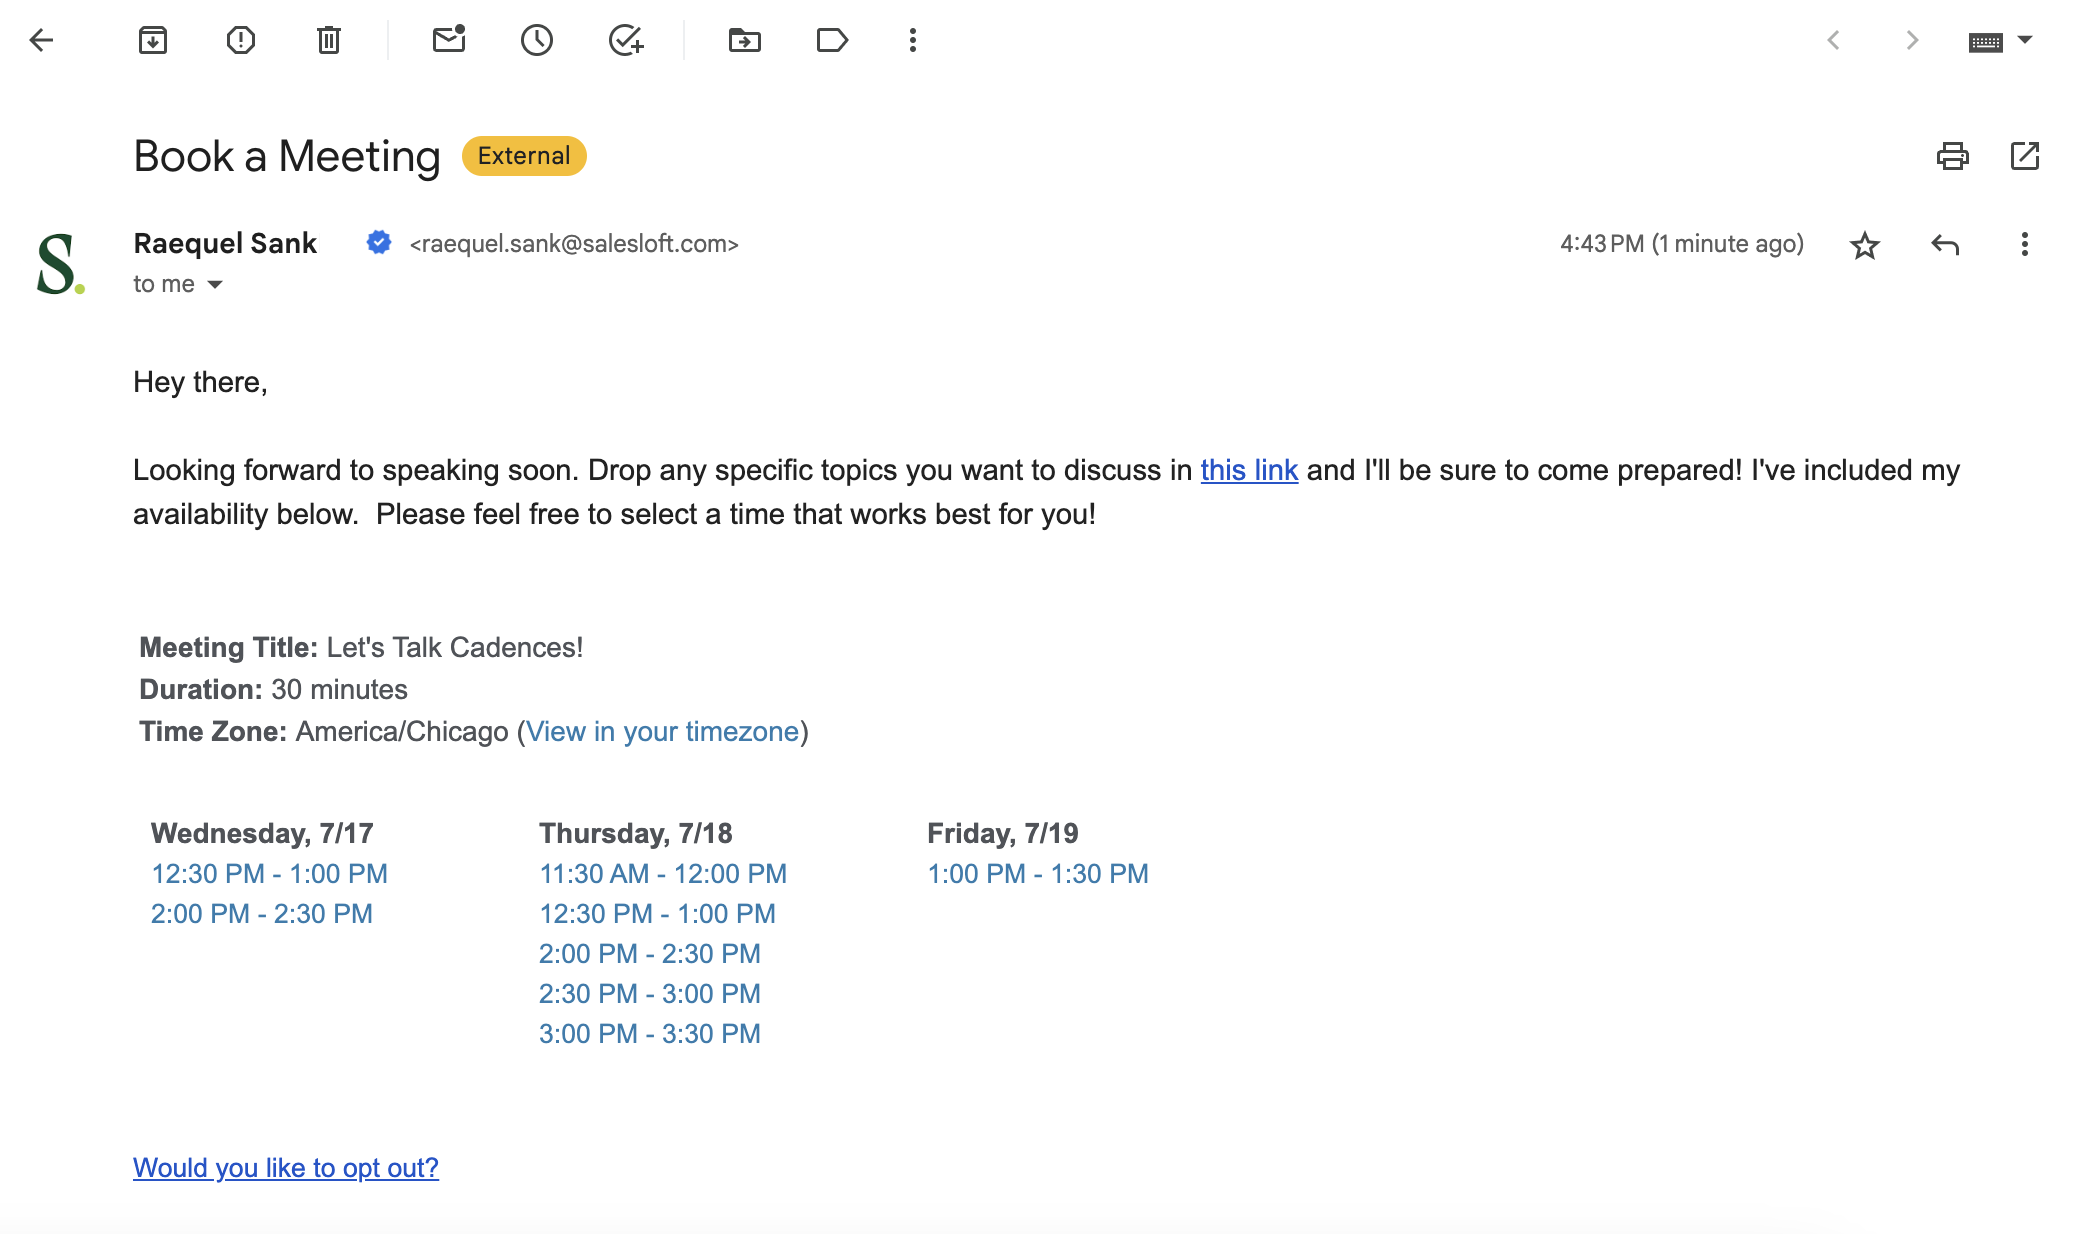
1. When you insert calendar links into an email, the recipient will see your availability listed within the email body. When a Person clicks a link, they'll be taken to a booking window.
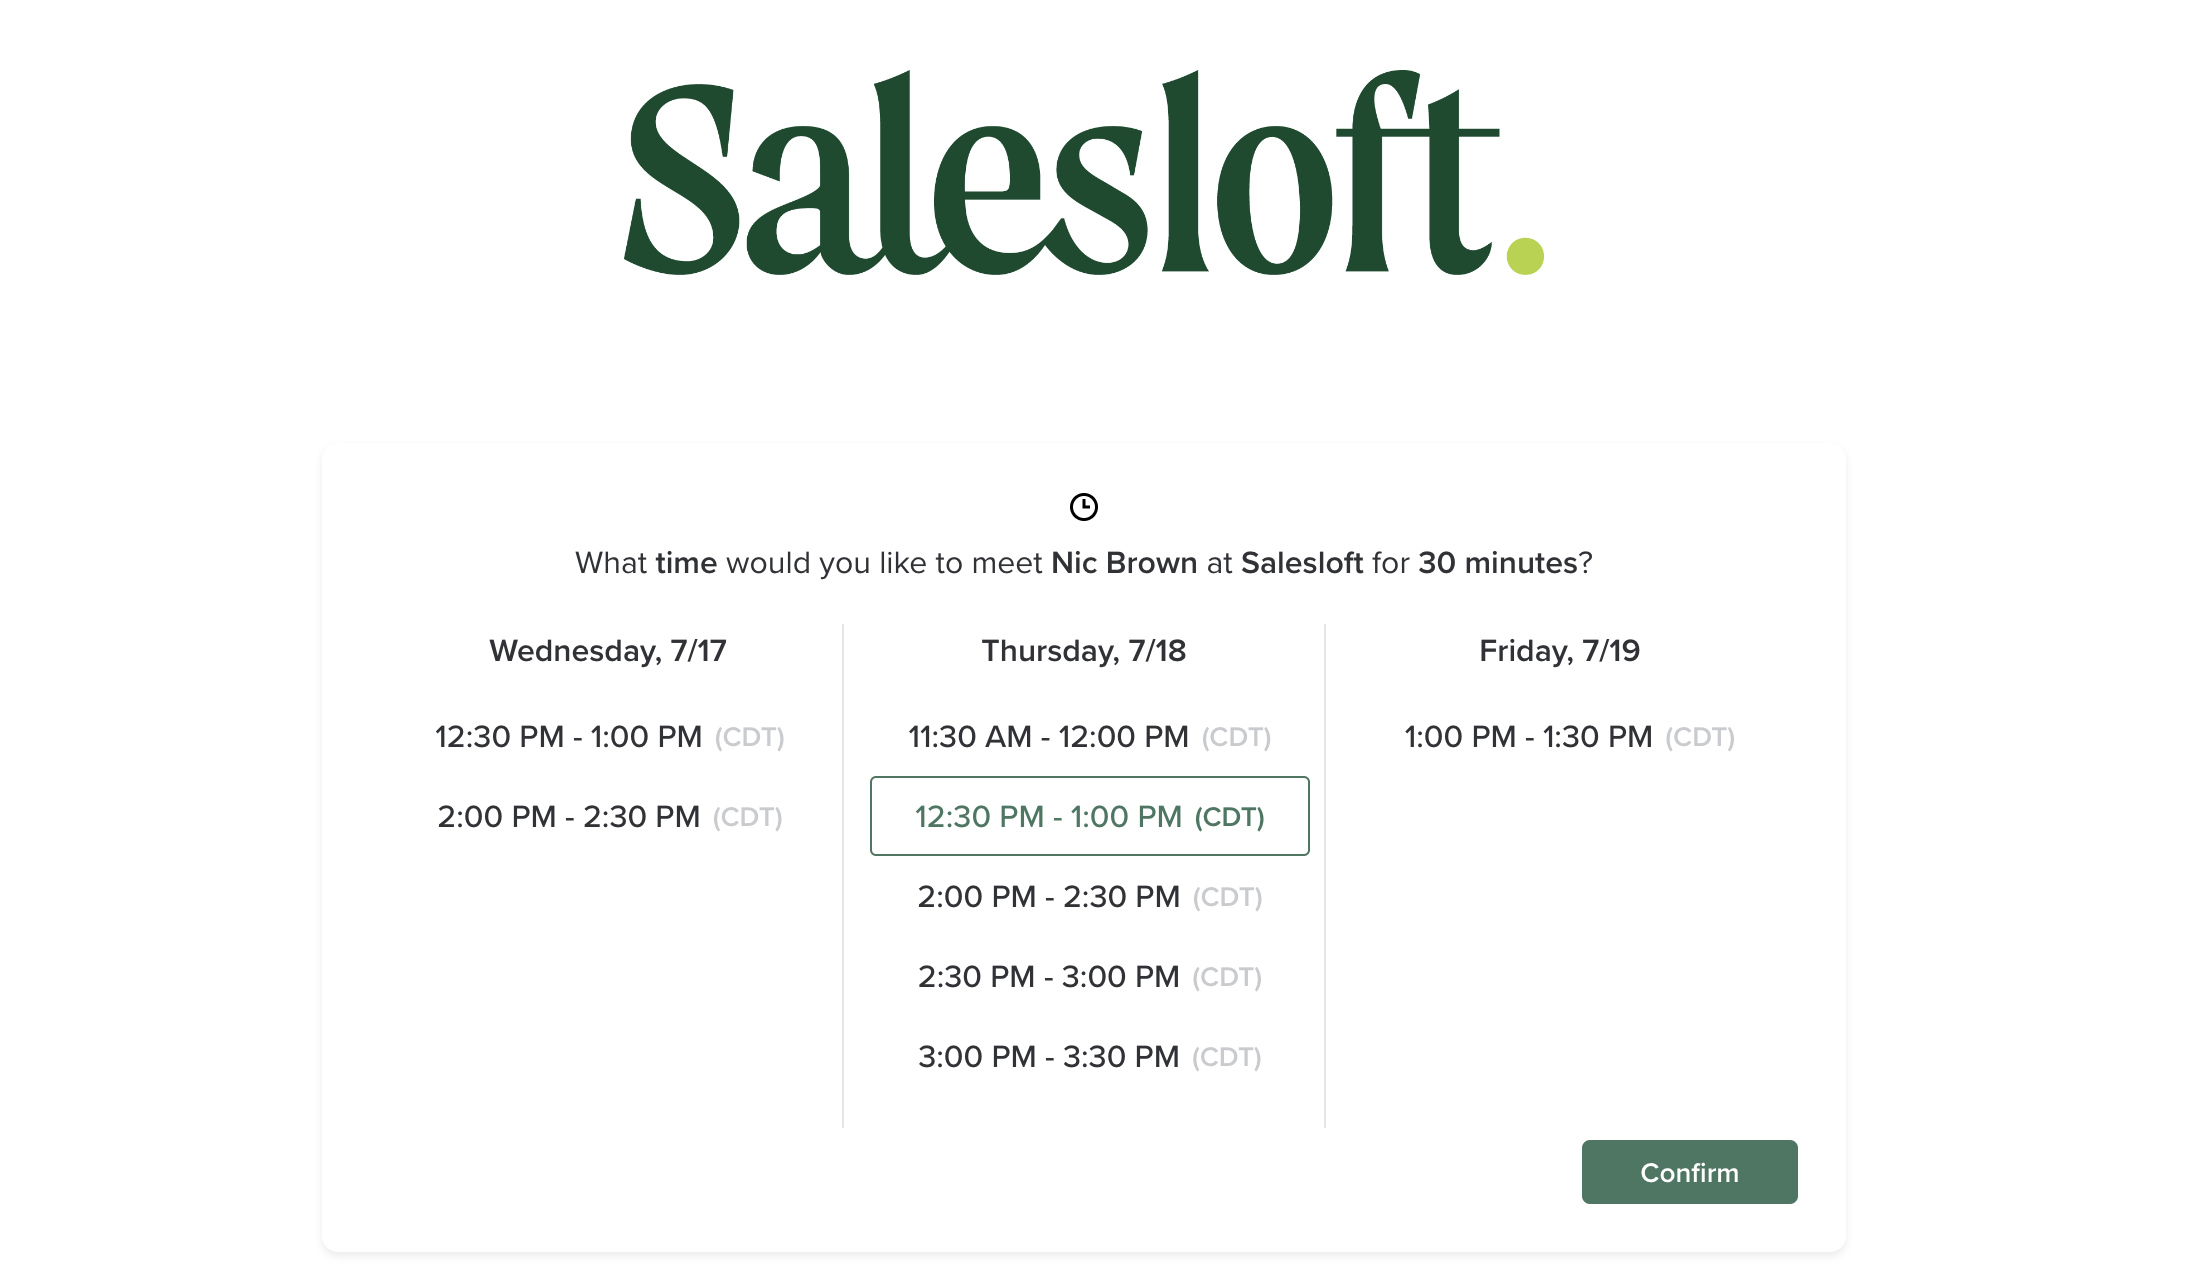
2. From the booking window, the Person will confirm the date and time they want to meet with you. Hit Confirm to continue.
Things to Note: When a person not in Salesloft books a meeting through the meetings calendar, a new Salesloft Person will be created. Salesloft will use the Person's email address to verify whether they are a Person in Salesloft.
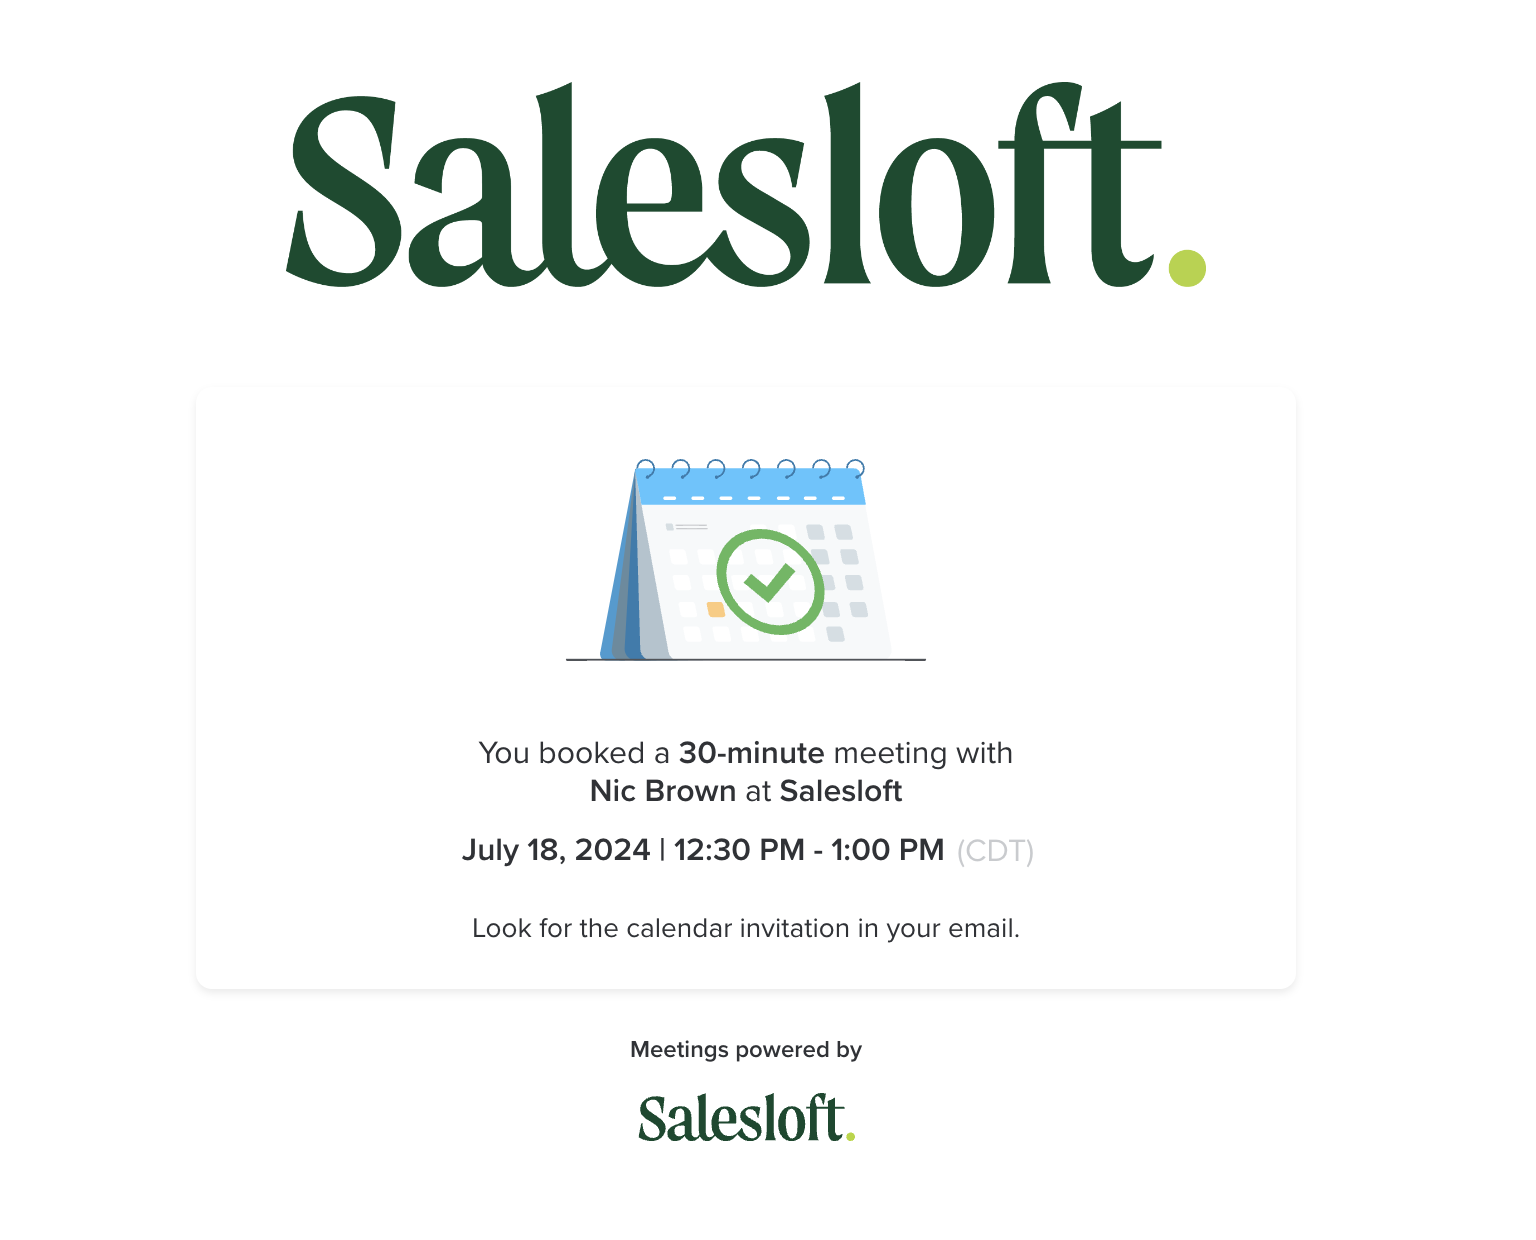
3. Once the meeting is booked, the Person will automatically receive confirmation of the meeting.
4. The Person will also receive a meeting invite. We recommend asking the recipient to confirm their attendance via the meeting invite.
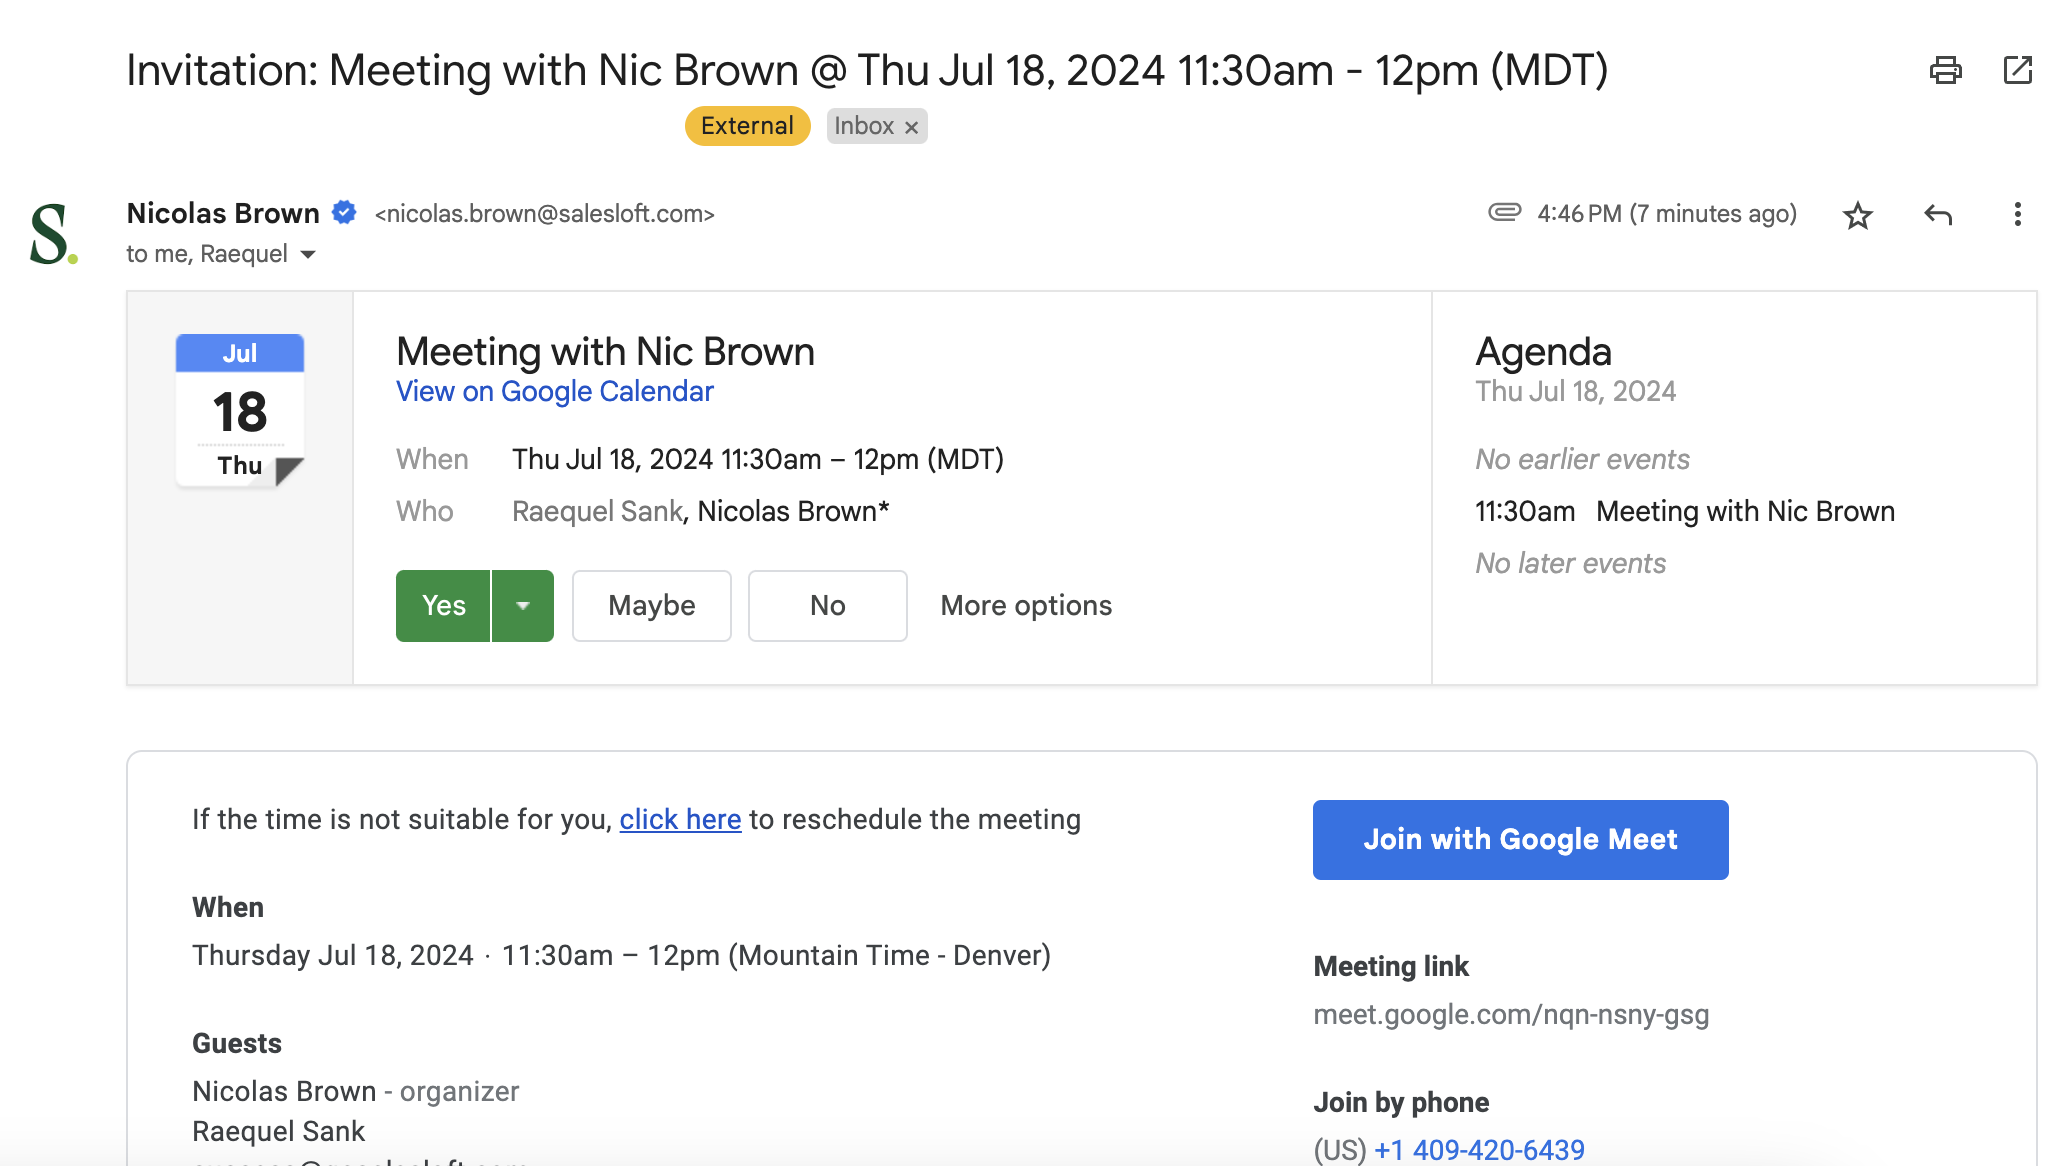
5. Once the Person books the meeting, you will receive an email notification. You will also see the meeting reflected on the calendar.
Additional Information: Book a Meeting
Meeting Attribution
Salesloft uses Meetings Attribution to give credit to the actions that create booked meetings. Meeting Attribution looks at the various meeting types (adding Calendar links, syncing your calendar, .etc), and notices if a Cadence step occurred before the meeting was booked. When this happens, the most recently run Cadence will be recognized as the source of the booked meeting.
To learn more about Meeting Attribution, check out the Meeting Attribution article.
Things to Note: You may notice an uptick in meetings booked under your Cadence metrics. This is due to more meetings being attributed to Cadences.
Booked Meeting Notifications
Once a meeting is booked, you will receive notifications inside of Salesloft informing you of the booked meeting. These notifications will appear in your
Live Feed which can be viewed from your Home Actions Dashboard or by clicking the Live Feed icon in the upper navigation bar.
You can also select to have notifications appear as
Chrome Notifications or in the
Salesloft Mobile app.
Viewing booked meeting notifications is particularly beneficial for teams where reps may book meetings on behalf of another peer. For example, if an SDRs books meetings on behalf of their Account Executives, the AE's can be constantly aware of when a new meeting is booked on their calendar and keep track of Prospects' responses.
Next Steps