A
Salesloft Cadence is a repeatable series of steps, or sequence, that mimics your sales process to create a consistent process. Your Cadences in Salesloft allow you to seamlessly execute your tasks in a way that fits your work rhythm (or cadence...get it?). Since every sales process is different, Salesloft allows you to create and customize your Cadences to your preferences.
The same creation process is used for creating personal and Team Cadences, or shared Cadences between all users on your team.
In this article, we will walk through the steps to create a Cadence, including:
- Salesloft Admins have permissions to create Cadences by default. Users must have a Salesloft role with permission to create Cadences.
- The Artificial Intelligence Cadence Purpose field is required when creating a new Cadence. It is optional for pre-existing Cadences.
- Users with permissions to create and edit cadences, such as admins and managers, can set the "Cadence Purpose"
- Beginning in November 2025, any new Cadence must include the Cadence Purpose to proceed.
- For existing Cadences, or Cadences created prior to November 2025, adding a "Cadence Purpose" is optional. If the fields are empty, the AI will generate content using its base logic without the benefit of your strategic direction.
- The AI Knowledge Library files must be added to the AI Knowledge Library by a Salesloft Admin before they can be included in a cadence.
- If a rep executing a step does not have permission to view an associated document due to group assignments, the AI will ignore that document when generating content for that specific rep.
- The Cadence Owner can be chosen for users who have the Manage Cadences Ownership Permission. Users who do not have this Permission will be assigned as the Cadence Owner automatically.
- Team admins can edit the Cadence priority levels to fit your team.
- After the Cadence has been created you can edit information from the Settings tab found in the Cadence view.
- Stages Settings inform you where a Person is in your sales cycle. A team admin can define what the available Person settings include in the Team Stages Setting.
Watch this quick video to learn how to create a Cadence.
Any time you want to create a new Cadence, you will start from the Cadences Page.
To add a new Cadence, follow these steps:
- Go to the Cadences Page: In Salesloft, navigate to the Cadences page by going to the top navigation bar. Hover over Content and select Cadences.
- Click "Create Cadence": In the upper right corner of the Cadence list, click the Create Cadence button. You will be directed to the Cadence Settings page.
- Define Cadence Settings: Follow the instructions in the sections below to configure the various Cadence settings.
- Save Settings: Once you have configured all the desired settings, click the Save Settings button.
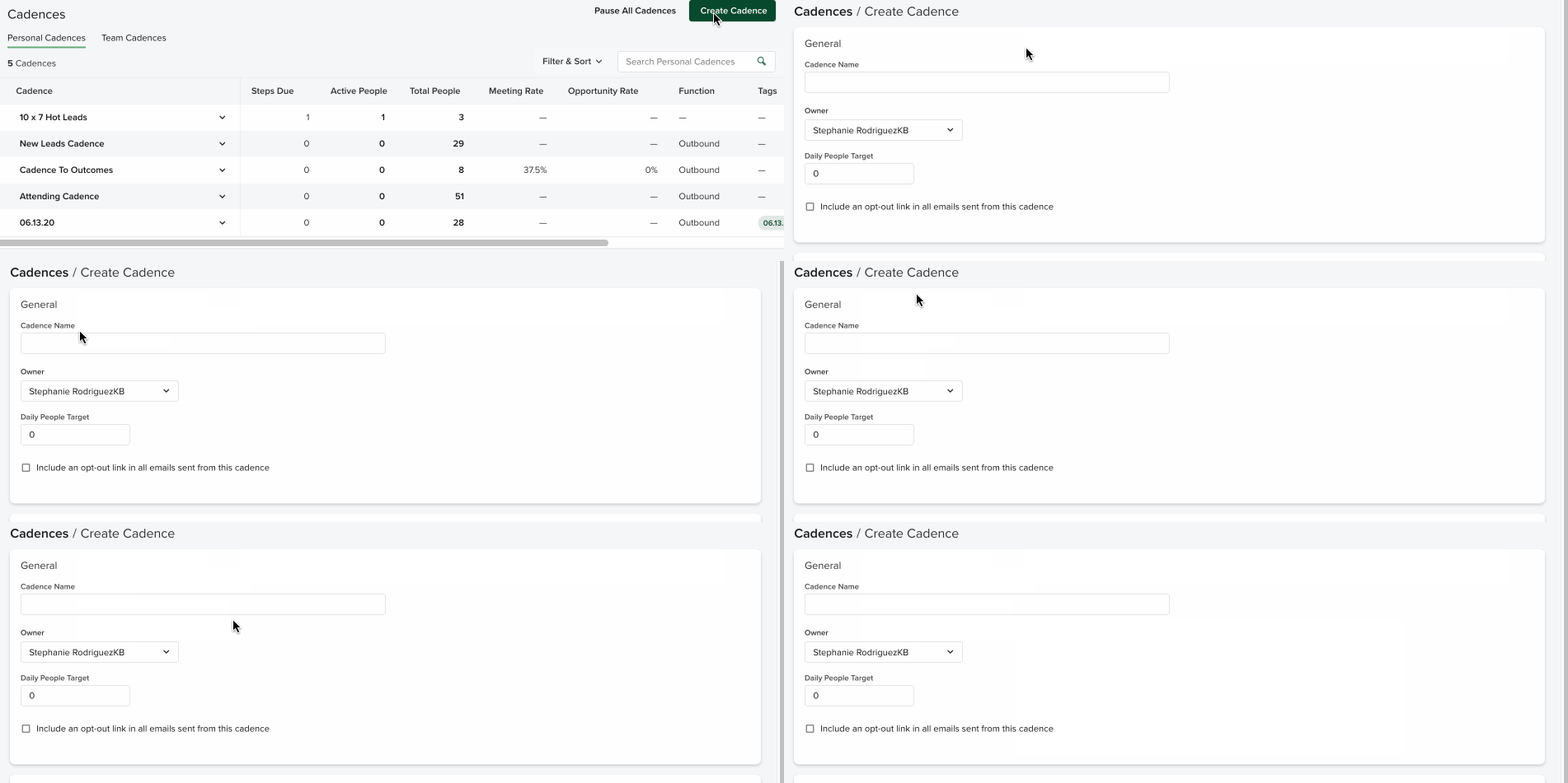
Figure 1: Create a Cadence GIF
Your General Cadence Settings assign the basic information required for a Cadence. This includes the following fields:
- Cadence Name: Enter a descriptive name that reflects the Cadence's purpose or target audience.
- Cadence Owner: Select the Salesloft user who will be the owner of the Cadence.
- The owner of a Team Cadence is the user who puts the Cadence together. This may be an admin or manager.
- When you create a Cadence, the owner will default to your name.
- Daily People Target: Set a target for the number of people you want to add to the Cadence each day.
- If you do not meet your goal for a day, there are no penalties within the application.
- If you create a Cadence and know you need to consistently reach out to 20 people per day in order to meet your quota, set your daily people target to 20.
- Include an Email Footer: Adds your designated Email Footer to the bottom of any emails sent from the Cadence. Email footers may include standard messaging or an opt out link that will mark the person as Do Not Contact in Salesloft.
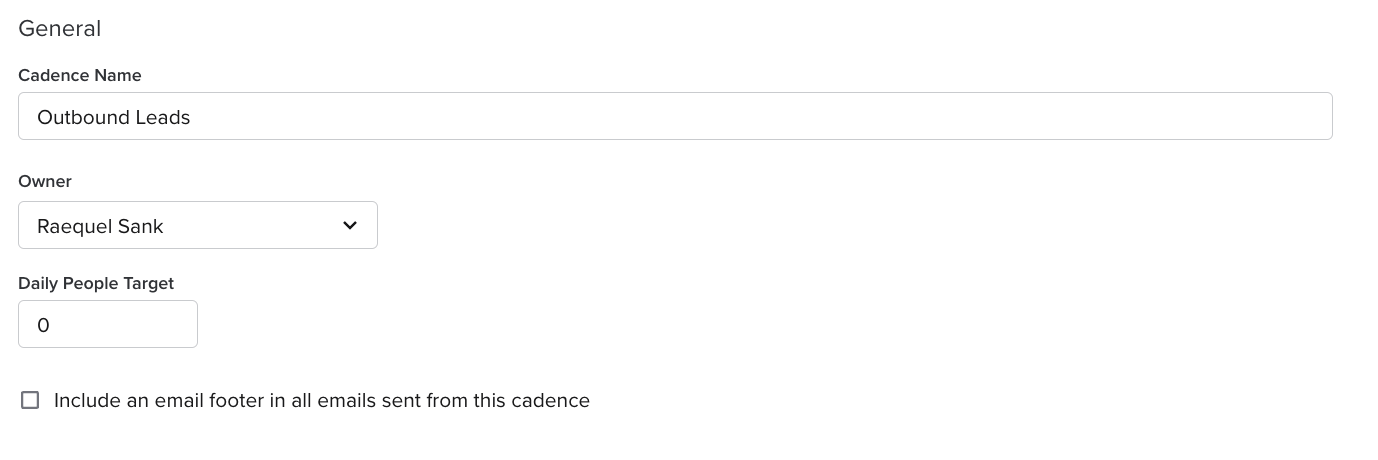
Figure 2: General Cadence Settings
The Artificial Intelligence section of your Cadence Settings is where you can set up how Salesloft AI will generate Cadence content that is more strategically aligned with your goals and objectives.
To configure the cadence Artificial Intelligence settings, complete the following:
- Enter your Cadence Purpose (Required): In the text box, define the overall strategy, target audience, pain points, and desired tone for the entire Cadence. Think of this like the prompt for Cadence content.
- If you’re having difficulty forming your Cadence Purpose, you can select a pre-generated suggested option or enter your own text and click the “Help me write” icon. Clicking the “Help me write” icon generates a rewritten Cadence purpose prompt based on your goals and cadence strategy you have entered.
- Select “AI knowledge library files” (Optional): Search for and link up to 10 documents from the AI Knowledge Library directly to a specific Cadence. Once added, the AI will use this content as the primary source of truth when generating drafts for any AI-assisted step.
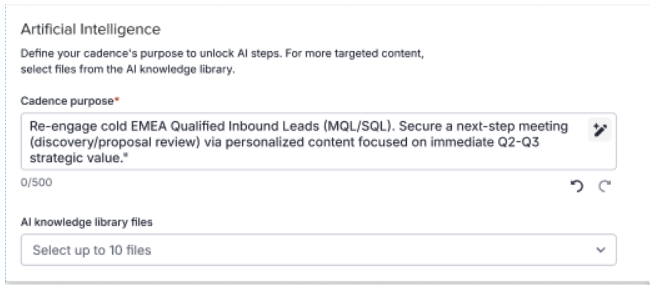
Figure 3: Artificial Intelligence Settings in a Cadence
Your Cadence Classification Settings help define the type of Cadence you are creating. Most of these classifications will allow you to filter and dig into additional Cadence metrics.
The Cadence Classification Settings include the following:
- Cadence Function: Select the function of the Cadence (e.g., Outbound, Inbound, Event, Nurture, Renewal, Other).
- Cadence Priority: Assign a priority level to the Cadence (e.g., High, Medium, Low, None).
- Cadence Tags: Add tags to categorize and label the Cadence. To add a tag, type the name of the tag you want to apply and hit the Enter key on your keyboard. The tag will appear in a bubble above the Add New Tag text box. To remove a tag, under Tags, click the X next to the tag name you want to remove.
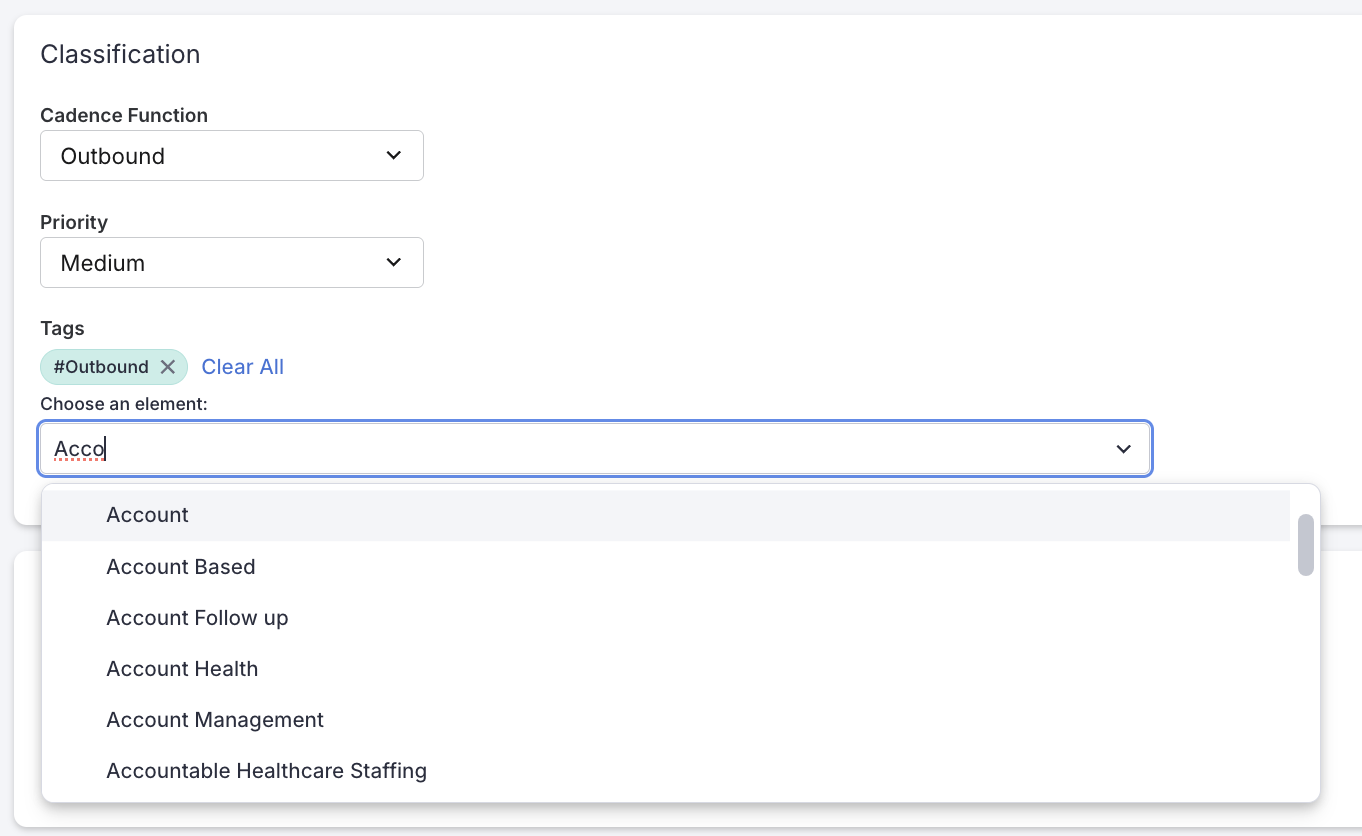
Figure 4: Cadence Classification Settings
The Sharing Settings allow you to choose the Cadence Type, including Personal Cadence or Team Cadence. Choosing the Cadence Type allows you to assign how many users may have access to the Cadence.
Once you choose the Cadence Type, additional settings will appear, including:
- Personal Cadence
- When a Personal Cadence is selected, check the box for “Allow other team members to view and copy this Cadence” if you wish to share this Cadence with other users.
- Team Cadence
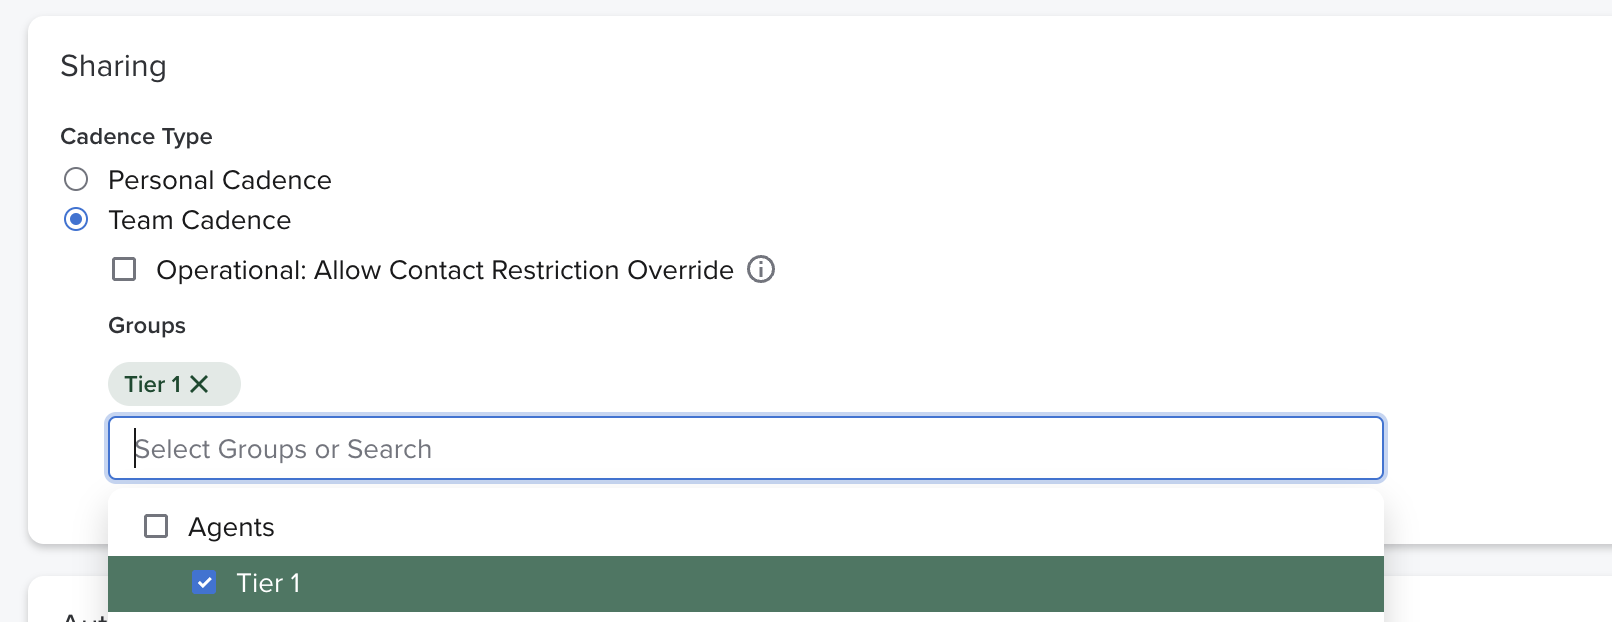
Figure 5: Cadence Sharing Settings - Team Cadences Example
Cadence Automation Settings assign specific actions to take place when an initial action (or triggering action) occurs. The automation settings include defining a Person’s stage based on a Cadence action and automatically removing People from the Cadence.
In your Cadence, you can put People into stages after certain actions occur. When a Stage is selected, the Person stage will update and reflect where they are in the sales cycle.
You can set stages when a Person completes the following actions:
- Email Bounces
- Replied to your email
- When you first add them to a Cadence
- When they complete a Cadence
Click the checkboxes to automate the following actions from your Cadence.
- Automatically remove people from this Cadence if they reply: Removes People from the Cadence once they reply to any Lofted email from a Cadence or sent as a one-off.
- Automatically remove people from this Cadence if their email bounces: Removes people from the Cadence if you receive a bounce back, meaning the email was incorrect or not deliverable.
- Automatically remove people from this Cadence if a meeting is booked from a related email step: Once a Person books a meeting using a calendar link or insert availability link shared from an email in this Cadence, they will be removed from this Cadence.
- Things to Note: This feature will only remove a Person from a Cadence when they book a meeting using your Salesloft Meeting link sent from the Cadence email.
- It will NOT remove person from the cadence in the following cases:
- A sales rep books a meeting on demand via “Quick Actions“ in Salesloft.
- The meeting is booked using the Google / Outlook calendar and synced to Salesloft.
- An SDR books a meeting on behalf of the prospect via their calendar page.
- The sales rep sends a non-Salesloft meeting link.
- Automatically reschedule step due dates when a person is marked out of office: Enables Out Of Office (OOO) Detection, which will shift Cadence step dates when an out of office reply is received from a Person.
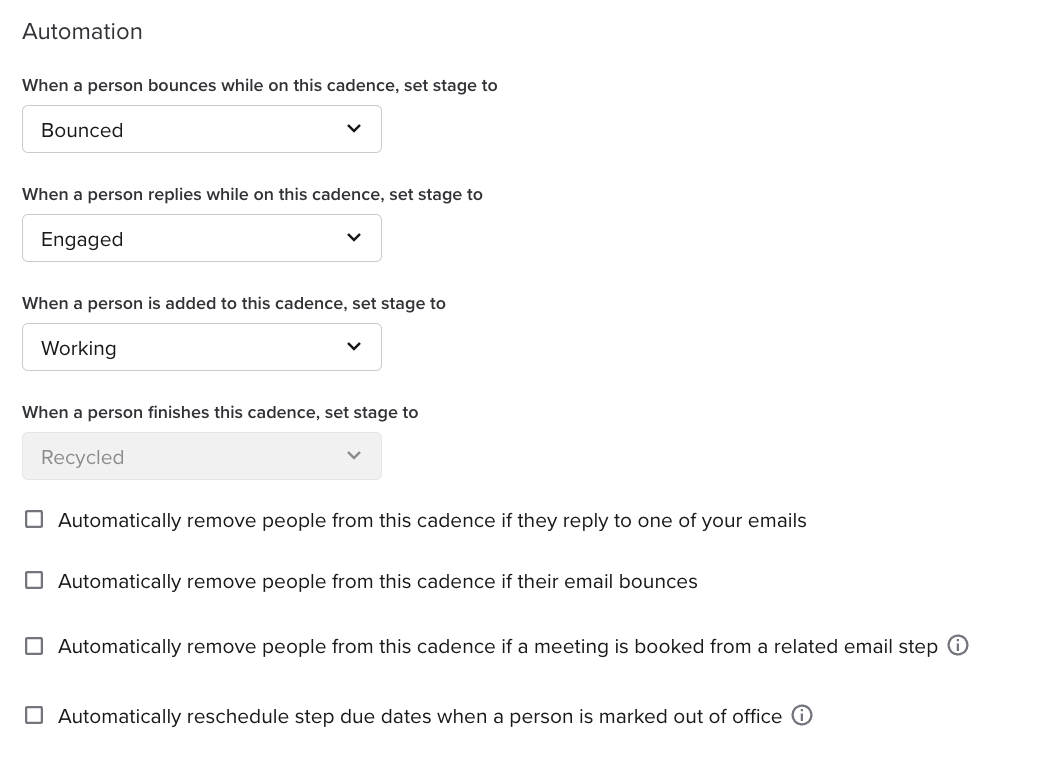
Figure 6: Cadence Automation Settings
The External Identifier helps identify a specific Cadence based on one identifier. It comes in handy when a team wants to report on an individual Cadence's track record or a group of Cadences.
The External Identifier can be mapped and pushed to your CRM in the Activity Field Configuration. To add the External Identifier to a Cadence, follow these steps:
- Create the Cadence.
- Scroll to the Advanced section.
- In the External Identifier text field, enter the name you want to associate to this Cadence. You can add whatever identifier you would like, but we recommend using a naming convention you will remember (like Cadence-31 or a series of numbers).
- Click Save Settings.
Figure 7: Cadence Advanced Settings
The final settings on the Cadence Settings page allow you to remove the Cadence from Salesloft.
There are two ways to remove a Cadence:
- Archive Cadence: Best practice is to archive cadences that are no longer in use.
Figure 8: Archive Cadence Window
- Delete Cadence: Permanently delete this cadence from your Salesloft instance. Deleting this cadence will remove everyone from this cadence. Any data associated with the Cadence will be gone and cannot be recovered.
Figure 9: Delete Cadence Window
Click the option that best suits your needs. After you select an option, a pop up will appear to confirm the action. Once the action is completed, you will be redirected to the
Cadences Page. The Cadence you Archived or Deleted will no longer be visible.
- Cadences are highly customizable to fit your specific sales process and workflow.
- Your Cadence’s name should give you a quick idea of this Cadence’s use. For example, you could name your Cadence after the role of people you are reaching out to (i.e. VP of Sales) and then follow that with a breakdown of how many steps will run over however many days (so a 10 step Cadence that runs for 14 days would be “10 x 14”.)
- Once the Cadence Priority is set, you can prioritize your Cadence list when you run your steps.
Once you hit Save Settings on your Cadence Settings, the Cadence has been created and exists as a Cadence. However, the Cadence you’ve created is an empty shell. Cadence Steps need to be added in order to complete your new Cadence.
As soon as you hit Save Settings, you will be directed to the Cadence Overview page. The space will have two available options:
- Start from Scratch: Allows you to add steps on your own. This is best for creating your own specific Cadences.
- Start with Cadence Frameworks: Allows you to select a Cadence Framework.
If you start from scratch, you will choose the type of step you want to add to your Cadence. Click the appropriate link below to learn more about each kind of step type you can add to your Cadences.