Account Details are all of the information you can view about a particular Account. You can view these details from The Account Profile Page.
All of the visible information comes from Account field types. If your team admin has configured your CRM Field Configuration, the field types will pull from your CRM whenever you import an account into Salesloft.
However, in our face-paced, ever-changing world, it's a given that sometimes company related data is going to need an update as addresses change, revenue grows, and new information comes into being. You can manage and edit all of these fields on the Account level from the Account Details page.
In this article, you will learn how to edit Account details. This article includes:
You must have the Manage Accounts permission enabled to edit account details. The Manage Accounts permission is enabled by default for the standard user and admin roles in Salesloft.
Every Salesloft Account requires data in the following two fields:
- Name: Name of the company.
- Domain: The website or URL that will act as the primary host for Salesloft data associated with this Account.
Fields information can be pulled from your CRM or a CSV file upon import based on your team’s Account Field Configuration.
When bidirectional sync is enabled for your team, any field updates will also reflect on the CRM Account.
Account information appears in the Account Details Panel. The Account Details panel shows all populated fields for the account, as well as Custom Fields. Information may be updated by clicking the Edit button. Only fields populated with data will appear in the information panels.
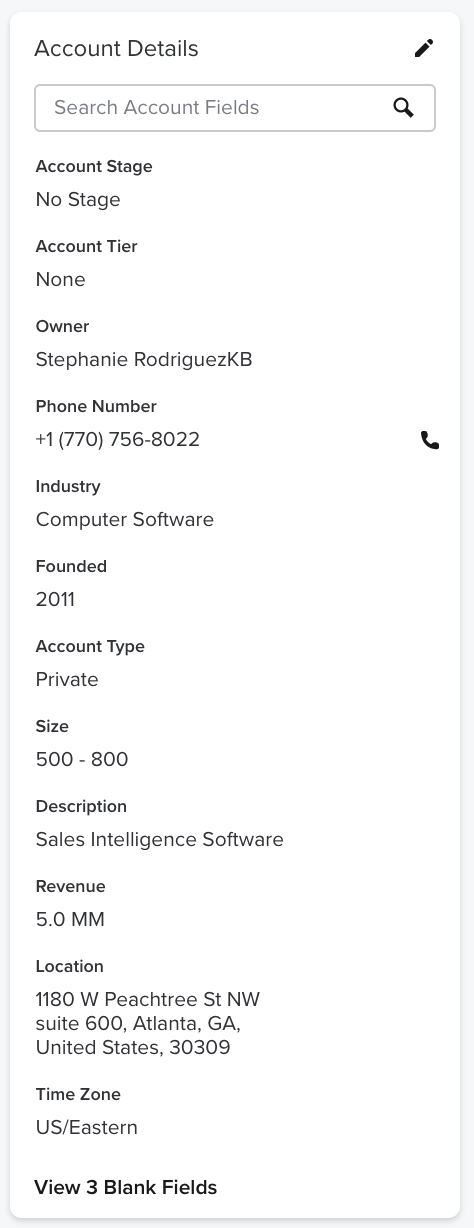
Figure 1: Example: Account Details Panel
Watch this quick video to lean how to edit account details.
While the Account Details Panel offers a quick glance of the Account's data, the details page allows you to view all of that data and edit existing additional fields.
To edit any information, follow these steps:
- Navigate to an Account Profile Page: You can access an Account Profile Page by going to the Accounts page and selecting an account name from the listview or selecting an account name anywhere inside Salesloft.
- Scroll to Account Details Panel: On the Account Profile Page, find the Account Details Panel on the left side of the page.
- Click Edit: Select the Edit button in the upper right corner of the panel.
- Update Field: Find the section and appropriate field you would like to edit. Type the updated information in the text box.
- Click Save: Once your information is completed, click the Save button in the bottom left of the page.
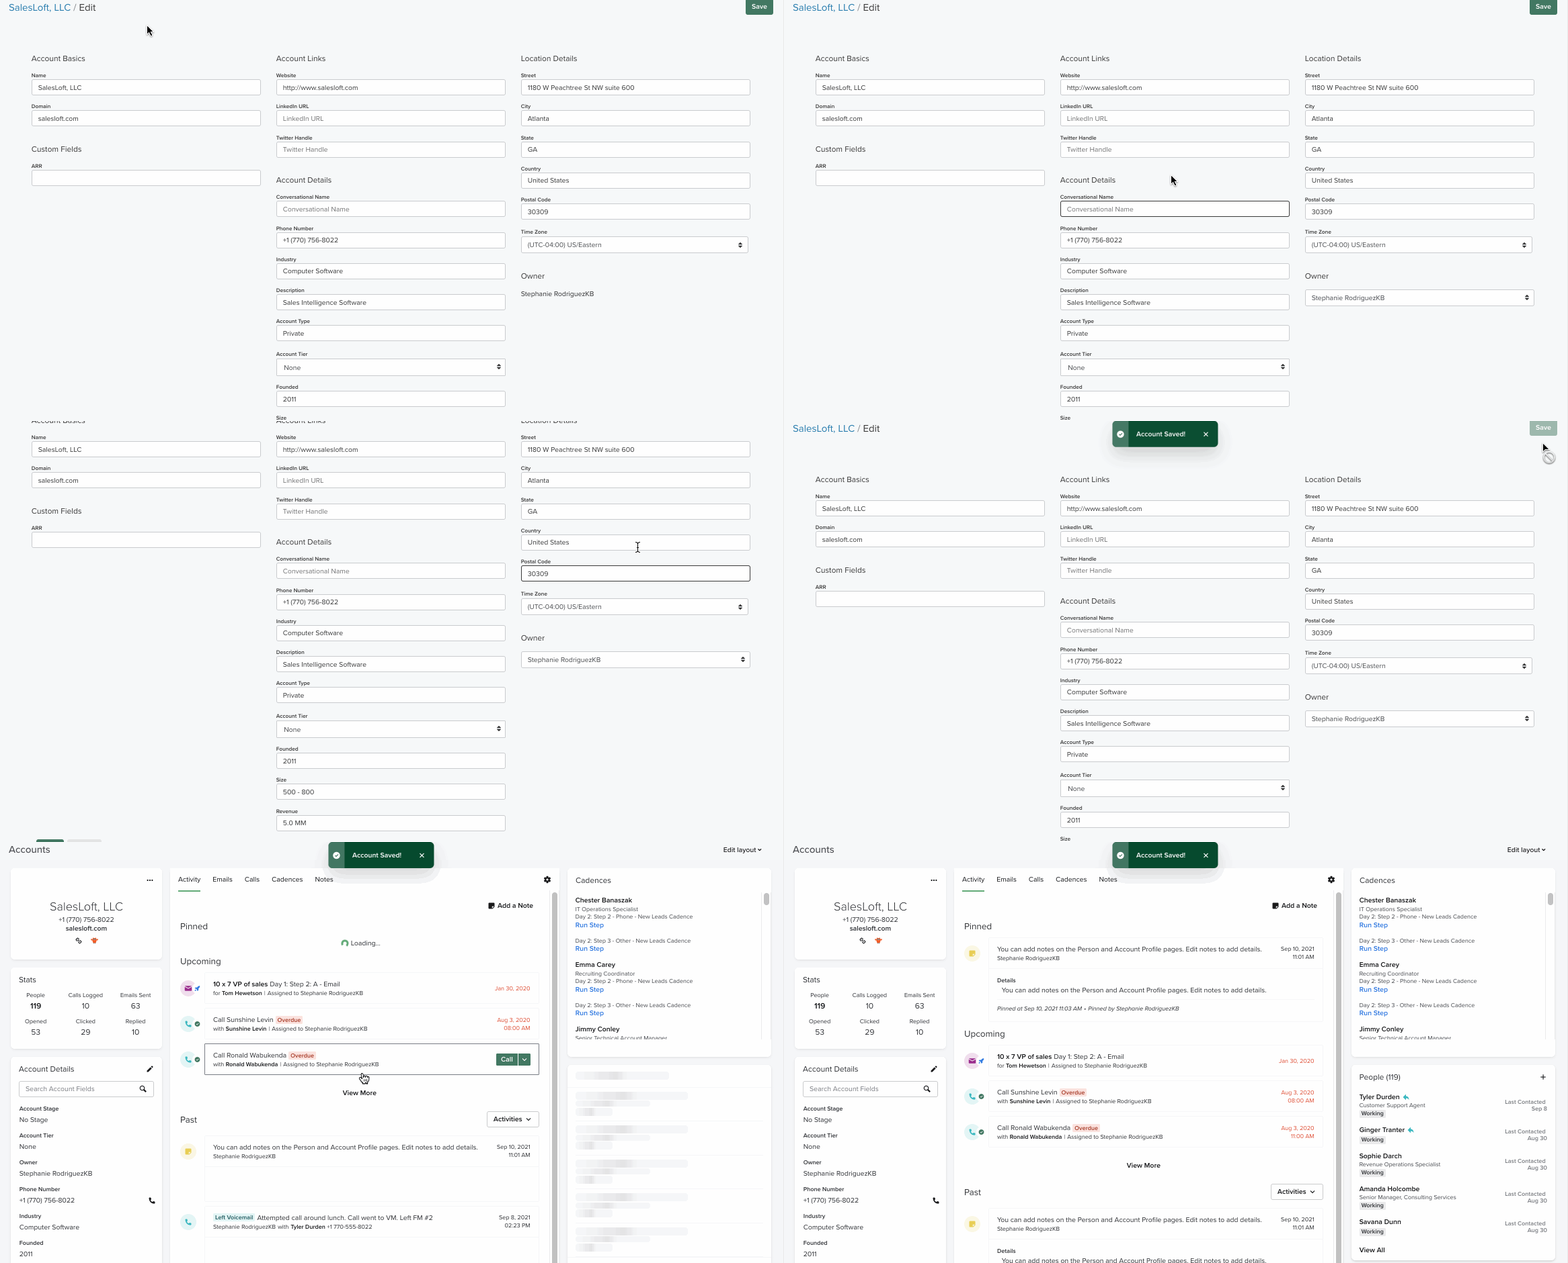
Figure 2: Edit Account Details from the Account Profile Page
The Account Details panel contains certain fields that allow quick actions, including:
- Account Stage: The Account Stage lets you know where this Account is in the sales process. This is especially beneficial for anyone using Account-Based Sales methods. To update the Account Stage, click the Account Stage and select from the stage drop-down menu.
- Account Phone Number: Click the phone number to complete a one-off phone call with the dialer.
- Copy phone number: Hover over the Account Details phone number. The option to "Copy" will appear on that line. When you click the "Copy" icon, the number will be copied and you can paste it in any application.
The Account Details Edit page contains sections for the various data points relevant to the Account. Salesloft includes the following sections by default:
- Main: Includes the Name and Domain of the Account. Since these fields are required, the information will be imported into Salesloft whenever you create the Account.
- Account Links: Account links offer quick access to sources outside of Salesloft. When the fields are completed, the links will appear as icons at the bottom of the Account Information Panel.
- Location Details: Location Details inform you about the whereabouts of the account.
- Account Details: Account Details contain the data that you will most likely want to reference during your sales process. These bits and pieces will help you keep you well informed about the customer so you can focus your talking points.
- Owner: The Account owner is the user who will work with the Account. Typically, the Account Owner will be the user who imports or adds the Account to Salesloft. The Account owner may be edited.
- Things to Note: You do not need to own the Account in order to communicate with them.
- Custom Fields: Custom fields are additional field types that your team admin can create. With custom fields in place, you can see the important data that relates to the Account you are working.
- For example, maybe you need to reference a specific CRM field when talking to a potential customer. After an admin creates and maps that custom field, you can view that information after the Account has been imported.
- Only custom fields that are listed to show in the Field Layout Settings will be displayed in the Custom Fields section of the Account Details page. Any custom field that is displayed in the Account fields section that contains a URL can be accessed or copied with one click.
- Now that you've updated the Account details, add People to the Account to start organizing your contacts and prepare for engagement.
- Explore the Account Profile Page to see all the details, recent activity, and engagement with this Account.
- Learn about other actions you can take on Accounts, such as adding tags, updating Account Tiers, or exporting Account data.